Gallery walls are Pinterest gold, and it makes sense. They look beautiful, and show off a homeowner’s unique point of view. But they can also be daunting. If you’ve ever left a framed print in limbo leaning against the wall in your living room for months…or years, you’re not alone. Frankly, starting is the hardest part!
Interior Designer Jessica Davis will be creating a gallery wall in her den space at the REAL SIMPLE HOME, and she has a strategy for beginning your gallery wall journey. “Start with one key piece,” she says. “I’ll begin with one large piece that anchors the wall, laying the gallery out on the floor first, then place other pieces around it to get an idea of spacing.” Once you’ve found your big piece, the rest will flow from there. And when it’s time to hang up your artwork, you’ll begin with that big piece as well. If things change as you work, don’t sweat it. “Sometimes the arrangement morphs a little as things get hung,” she says. “Remember, it’s art, not science!”
Whether you want to curate a mix that encapsulates your family’s style, or you’re an avid collector who simply needs a nudge to finally populate that big bare wall, here’s a guide through the process of creating a stop-and-stare worthy gallery wall.
Make an Eclectic Arrangement
Jessica Davis
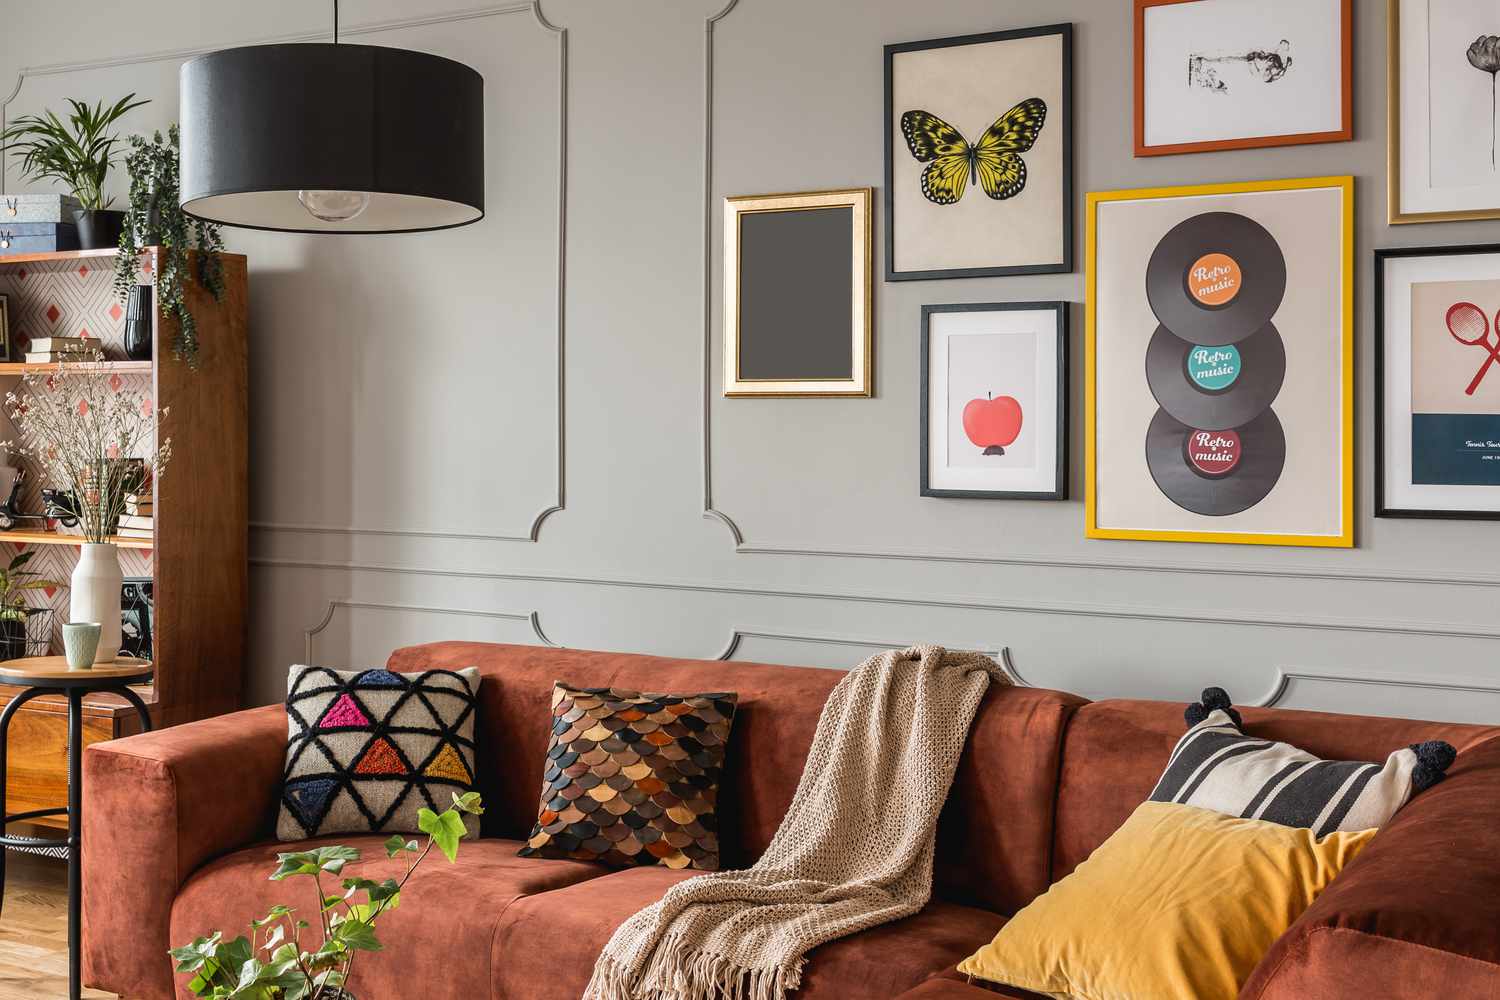
Gallery walls don’t have to be perfect, in fact, they’re a lot more fun to look at when they have a variety of different styles and sizes. “Mix mediums and keep things varied,” Davis says. “Don’t be afraid to mix photography with painting and textiles, prints, and sculptural vases.” The same idea goes for the frames and sizes. Feel free to incorporate wood, brass, and acrylic all in one wall with large prints, tiny photographs, and everything in between. “The more varied the sizing, the better,” she says.
Tips
- Add curved elements and sculptural objects to give the assortment dimension.
- When thrifting, search for high-quality frames. If the art was special enough for someone to frame nicely, it’s worth a careful look.
- Have your own photo to display? Online framing companies can produce high-quality prints along with custom frames in one easy process.
Stock a Staircase
An assortment of large posters and smaller prints brings color and personality to a staircase wall, which is often an overlooked area. Stagger the frames parallel to the steps, and use the railing as a guide for the lower edge of the arrangement.
Tips
- The “more the merrier” approach shown here also works in other clearly constrained areas, like the walls of a powder room.
- In high-traffic areas like the stairway, pieces can easily get bumped askew. To keep art even and level, anchor the corners of each frame with removable adhesive strips.
Lean It on a Ledge
If you have ever-changing tastes and an always-expanding collection, a shallow shelf lets you rearrange your display on a whim (without leaving holes in the wall).
Tips
- Set a color palette to tie your art and frame collection together, no matter the mix of mediums or materials.
- Layer only two frames deep. More will look bulky.
- The center of the composition should be at eye level.
Build a Floor to Ceiling Feature Wall
CM Natural Designs/ Aaron Leitz
We’ve long relied on paint to create a statement wall, but a floor-to-ceiling gallery wall is even more dramatic. Mill Valley, CA-based CM Natural Designs created this dining room wall using based on the clients art collection (they had more than half of these!) then supplemented with other prints, drawings, and paintings, all in a neutral color scheme.
Tips
- Start from eye level, then build up and down. The pieces in the middle will be the most noticeable, so place your favorites here.
- Place your least favorites on the bottom– this is the last place people will look, so if there’s art you want to hang but aren’t in love with, it can go down by the floor.
- Lay your photos out on the floor first! This is like one big puzzle and you don’t want to get stuck with a missing piece once you’ve hammered in all the nails.
Make a Grid of Family Photos
If you’re more of a perfectionist and love the look of clean lines and even patterns, try a grid. This works especially well with family photos, or a group of pieces that are similar in tone and texture. Give meaningful pictures (and people!) a special spot in your home with a grouping of smaller pieces creates an intimate collection that invites guests to come in for a closer peek.
Tips
- To unify your collection, convert photos to black and white and use identical frames.
- A gridded layout fills a wall without appearing too busy.
If you’re placing art over a piece of furniture—be it a sofa or sideboard—the arrangement should span two-thirds its width, with the lowest frame edge at least 4 inches above it.
Pick a Theme
Daniel Barrett Mathis
Daniel Mathis, also known as @notaminimalist, is a collector of many many things. One of them is portraits! He thrifted this group of portraits all by one artist and hung them across his living room wall to create a really dramatic and colorful backdrop. While his were all created by the same painter, yours don’t. have to be! Portraits of all different styles would work just as well.
Tips:
- To pick a good theme, first look at what you have at home and what you like. Landscapes, botanical prints, line drawings, food photography, and abstract blue designs would all work as an organizing principle.
Keep it Contained
Getty/ Katarzyna Bialasiewicz
Homes with architectural details like picture molding instantly create the perfect place to hang art. You have the freedom to hang items however you like (some empty space is OK!) the only rule is that the items have to stay within their border.
Tips
- Stick with thinner frames. Chunkier ones can take away from the delicate architectural details and wash them out.
- If you don’t have a natural border like in the rom above, create your own! Ekena Millwork (and many other companies) have plastic or resin molding that you can add to your wall with a little DIY.
Professional Advice on Gathering a Collection
Buying
Art should complement, not compete with, your room’s focal point. Look at your rug, for example. If it has a busy pattern, stick with one large piece instead of a gallery wall.
Incorporating sentimental ephemera (like cherished kids’ drawings or ticket stubs) instantly brings character to a collection. In your display, aim to have one out of every five pieces feel homemade or autobiographical. Coffee table books can also provide inspiration for visual imagery.
If you like the look of paintings but are on a print budget, search for words like “giclée” or “artist enhanced” in the description. These techniques give a suggestion of brushstrokes.
Shopping Sources
If you’d like to start an art collection beyond family photos and kids’ art, check out these sellers.
etsy.com: Consider this your go-to for options in a variety of styles and price points. You can even request customized pieces from the many talented artists.
20×200.com: The affordable, limited-edition artworks mean you likely won’t find the same piece hanging above your best friend’s sofa.
juniperprintshop.com and bffprintshop.com: These sites offer art on demand—they’ll email you a digital file to print at home in whatever size you like. Plus, they curate a relatively small collection of art, which is great if you find yourself easily overwhelmed by endless options.
minted.com: With thousands of fine-art prints, starting at $31, this site lets you pick from multiple sizes, frame styles, glass types, and matting to personalize your selection.
artfullywalls.com: This site sells a highly curated selection of prints, but the best part is that they’ll show you dozens of sample gallery walls, made using their works. Inspiration anyone?
artstar.com: They sell fine art prints, paintings, and limited edition photography that are all exclusive to their site. If you’re looking for a statement piece, look no further.
Thrift stores and flea markets: The beauty of shopping secondhand is twofold—you’ll find one-of-a-kind pieces to make your home feel extra special and you’re upcycling.
Framing
Frames can get expensive (especially custom ones), but they’re worth the investment because quality options elevate the look of the entire room and last longer than bargain versions.
Aside from your local framer, the pros also recommend Framebridge, Michaels, and Simply Framed for custom jobs.
If you plan to hang something across from a window, consider matte paper without glass or a canvas print to prevent glare. Alternatively, museum glass is relatively glare-free.
Hanging
Even the pros can have a hard time hanging art. Especially getting different frames to line up evenly. That’s why they swear by this trick: Stick painter’s tape across the back of the frame and mark or poke a hole where the hook or nail should go. Then transfer the tape to the wall and attach the hardware in the right spot on your first try. laser level can also really help with precision.
If there’s an architectural element in your space (like a fireplace), display one large piece of artwork above it and hang a gallery-style arrangement on the opposite wall.