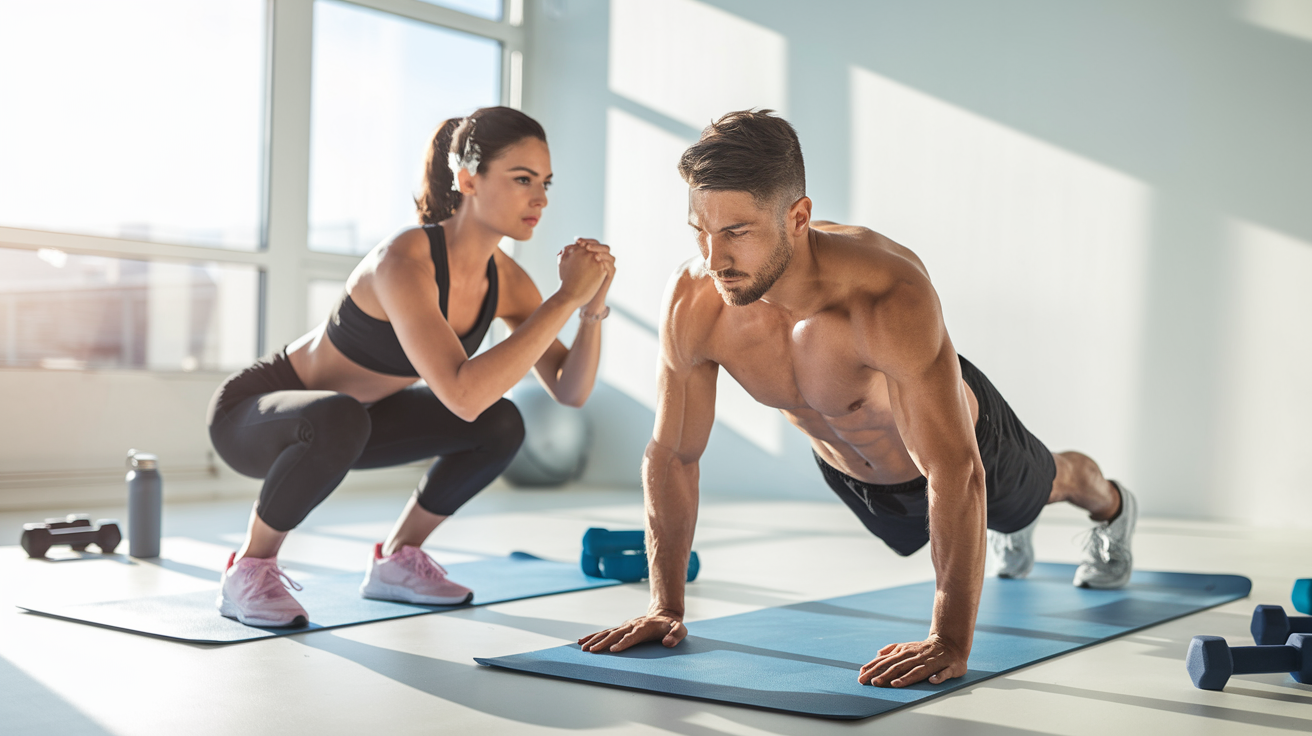
Want to lose weight, get stronger, and tone your body—without stepping foot in a gym? The good news is you don’t need fancy equipment or hours of training to see results.
With the right home exercises, you can burn calories, build muscle, and shape your body using just your bodyweight (and maybe a mat or pair of dumbbells).
The key is consistency. Even 15–20 minutes a day of effective exercises can help you shed fat, boost energy, and increase strength—all from the comfort of your living room.
These 15 easy home exercises are perfect for beginners and intermediate fitness lovers who want a balanced routine that targets the arms, legs, abs, and full body.
Unlike extreme workouts that leave you exhausted, these moves are simple to learn, joint-friendly, and can be modified to suit your fitness level.

Whether your goal is weight loss, muscle toning, or overall fitness, these exercises will help you stay motivated and see steady progress.
Here’s what you’ll find inside:
✅ Fat-burning cardio moves for quick calorie loss
✅ Strength-building bodyweight exercises for lean muscle
✅ Core-focused workouts to flatten and strengthen your abs
✅ Easy modifications for beginners—no equipment required
With just a little space and commitment, you can transform your body at home.
Let’s get into the 15 best home exercises that will help you lose weight, tone up, and feel stronger than ever.
1. Squats for Leg Strength & Fat Loss

Squats are one of the most effective and versatile lower-body exercises you can do, whether your goal is building leg strength, toning your glutes, or burning fat.
Often called the “king of all exercises,” squats target multiple muscle groups at once, making them highly efficient for both strength training and calorie burning.
Best of all, they can be performed anywhere — at home, in the gym, or even outdoors — with or without added weights.
Muscles Worked in Squats
- Quadriceps: Front thigh muscles that power knee extension and are essential for running, jumping, and climbing stairs.
- Gluteus Maximus: The largest glute muscle, responsible for hip extension and shaping your backside.
- Hamstrings: Back thigh muscles that assist in hip extension and knee flexion.
- Core: Engaged to stabilize your torso and protect your lower back during the movement.
- Calves: Help stabilize the lower leg and maintain balance.
By engaging these major muscle groups, squats not only build strength but also elevate your heart rate, increasing calorie burn and promoting fat loss.
How to Perform a Basic Squat (Step-by-Step)
- Set Up: Stand with feet shoulder-width apart, toes slightly turned out. Keep your chest lifted and shoulders relaxed.
- Engage Core: Brace your abdominal muscles to protect your lower back.
- Lower: Push your hips back and bend your knees to lower your body as if sitting in a chair. Aim for thighs parallel to the floor.
- Pause: Hold briefly at the bottom to fully engage your glutes and quads.
- Lift: Press through your heels to return to the starting position, squeezing your glutes at the top.
- Repetitions: Perform 12–20 reps for 2–4 sets, depending on your fitness level.
Form Tips for Maximum Results
- Keep your knees aligned with your toes; avoid letting them cave inward.
- Maintain a neutral spine; don’t round your back.
- Lower only as far as comfortable; gradually work toward parallel.
- Engage your glutes and core throughout the movement for stability.
Benefits of Squats
✅ Strengthens legs, glutes, and core
✅ Burns calories and supports fat loss
✅ Improves balance, mobility, and posture
✅ Boosts athletic performance in running, jumping, and cycling
✅ Can be done anywhere, with or without weights
Variations to Increase Intensity
- Goblet Squat: Hold a dumbbell or kettlebell at your chest for added resistance.
- Jump Squat: Add a small jump at the top for a cardio and power boost.
- Bulgarian Split Squat: Place one foot behind you on a bench or chair for single-leg strength.
- Sumo Squat: Widen your stance and point toes outward to target inner thighs.
- Barbell Back Squat: For advanced lifters, adding a barbell increases strength gains.
When & How Often to Perform Squats
Squats can be performed 2–4 times per week as part of a leg day, full-body workout, or fat-loss routine.
Incorporate them into circuits or paired with cardio for maximum calorie burn. Beginners should start with bodyweight squats, gradually adding resistance as strength improves.
Pro Tips for Faster Progress
- Combine squats with lunges or step-ups for a complete lower-body workout.
- Focus on slow, controlled movements to maximize muscle engagement and prevent injury.
- Include compound movements and cardio in your routine to enhance fat loss.
2. Push-Ups for Upper Body Strength

Push-ups are a classic bodyweight exercise that builds upper body strength, core stability, and overall functional fitness.
They are incredibly versatile, requiring no equipment, and can be modified to suit beginners or advanced athletes alike.
By targeting multiple muscle groups at once, push-ups not only improve muscle tone but also enhance posture, balance, and endurance.
Muscles Worked in Push-Ups
- Chest (Pectoralis Major & Minor): Primary movers that control pushing motions and build upper body strength.
- Shoulders (Deltoids): Stabilize and assist during the push phase.
- Triceps: Work to extend the elbows and support arm strength.
- Core (Abs & Obliques): Engaged to keep the spine neutral and maintain proper alignment.
- Back Muscles (Rhomboids & Serratus Anterior): Help stabilize the shoulder blades and prevent rounding of the upper back.
This multi-muscle engagement makes push-ups an efficient strength-builder while also increasing calorie burn, which supports fat loss when combined with proper nutrition.
How to Perform a Standard Push-Up (Step-by-Step)
- Set Up: Start in a plank position with hands shoulder-width apart and feet hip-width apart. Keep your body in a straight line from head to heels.
- Engage Core: Tighten your abs and glutes to prevent sagging in the lower back.
- Lower: Bend your elbows and lower your chest toward the floor, keeping elbows at about a 45-degree angle from your torso.
- Pause: Hold briefly at the bottom to maintain tension in your chest, shoulders, and arms.
- Push Up: Press through your palms to extend your elbows and return to the starting position.
- Repetitions: Perform 10–20 reps for 2–4 sets, adjusting volume according to your fitness level.
Form Tips for Maximum Results
- Keep your neck neutral; avoid looking up or letting your head drop.
- Avoid letting your hips sag or pike; maintain a straight plank line.
- Control the movement; avoid bouncing off the floor.
- Engage your shoulder blades and keep your chest open to maximize activation.
Benefits of Push-Ups
✅ Strengthens chest, shoulders, triceps, and core
✅ Improves upper body muscle tone and endurance
✅ Enhances posture and spinal stability
✅ Supports functional fitness for daily activities
✅ Can be done anywhere with no equipment required
Variations to Increase Intensity or Modify
- Knee Push-Ups: Lower intensity for beginners while maintaining form.
- Incline Push-Ups: Hands on a bench or wall to reduce resistance.
- Decline Push-Ups: Feet elevated on a bench for increased difficulty.
- Diamond Push-Ups: Hands close together to target triceps more.
- Plyometric Push-Ups: Explosive push-ups for power and increased calorie burn.
When & How Often to Perform Push-Ups
Push-ups can be performed 2–4 times per week as part of a full-body, upper-body, or strength-focused routine.
Beginners should start with modified versions and gradually progress to standard or advanced variations.
Combining push-ups with other upper body exercises like planks, rows, and shoulder presses can accelerate strength gains.
Pro Tips for Faster Progress
Pair with compound lower-body movements like squats or lunges for total-body strength and fat loss.
Focus on slow, controlled movements to maximize muscle engagement.
Incorporate push-up variations to prevent plateaus and target muscles differently.
3. Lunges for Toned Legs & Balance

Lunges are a powerhouse lower-body exercise that not only sculpts the legs and glutes but also improves balance, coordination, and functional strength.
Unlike some exercises that focus on just one muscle group, lunges work multiple muscles simultaneously, making them highly effective for strength, toning, and fat-burning.
They are ideal for home workouts, gym sessions, or even outdoor routines, and can be performed with or without added weights.
Muscles Worked in Lunges
- Quadriceps: Front thigh muscles responsible for knee extension and driving the movement.
- Gluteus Maximus & Medius: Targeted to lift, shape, and stabilize the hips and buttocks.
- Hamstrings: Support hip extension and knee flexion during the lowering and lifting phases.
- Calves: Assist in balance and stabilization, especially during forward or reverse lunges.
- Core Muscles (Abs & Obliques): Engaged to maintain proper posture and prevent tipping forward or sideways.
Because lunges require single-leg stability, they also enhance balance, coordination, and functional strength, which translates to better performance in sports, daily activities, and overall mobility.
How to Perform a Basic Lunge (Step-by-Step)
- Set Up: Stand tall with feet hip-width apart, shoulders relaxed, and core engaged.
- Step Forward: Take a controlled step forward with your right leg.
- Lower: Bend both knees until your back knee is a few inches from the floor and your front thigh is parallel to the ground. Keep your torso upright.
- Pause: Hold briefly at the bottom to fully engage the glutes and quads.
- Push Back: Press through the heel of your front foot to return to the starting position.
- Repetitions: Perform 10–15 reps per leg for 2–4 sets, adjusting as needed based on strength and endurance.
Form Tips for Maximum Effectiveness
- Keep your front knee aligned with your ankle; avoid letting it extend past the toes.
- Maintain a straight torso; don’t lean forward excessively.
- Engage your core throughout to prevent wobbling.
- Step back to the starting position instead of pivoting to avoid knee strain.
Benefits of Lunges
✅ Strengthens legs, glutes, and core
✅ Enhances balance, coordination, and joint stability
✅ Supports functional movement for everyday activities
✅ Burns calories and aids in fat loss
✅ Can be done anywhere with no equipment, or intensified with weights
Variations to Increase Intensity or Target Muscles Differently
- Reverse Lunges: Step backward instead of forward to reduce stress on the knees and target glutes.
- Walking Lunges: Move forward continuously for added cardio and coordination challenge.
- Side Lunges (Lateral Lunges): Step sideways to target inner thighs and improve lateral strength.
- Curtsy Lunges: Step one leg diagonally behind for gluteus medius emphasis.
- Weighted Lunges: Hold dumbbells in each hand to increase resistance and strength gains.
When & How Often to Perform Lunges
Lunges can be performed 2–4 times per week as part of lower-body, full-body, or strength circuits.
They pair well with squats, step-ups, or glute bridges to create a complete leg and glute routine.
Beginners can start with bodyweight lunges and gradually progress to weighted variations for greater strength and toning results.
Pro Tips for Faster Progress
Add lunges into circuits with cardio or upper-body exercises for total-body fat burning.
Focus on controlled movements rather than speed to maximize muscle engagement.
Incorporate a variety of lunge types to prevent plateaus and target different leg muscles.
4. Plank for a Strong Core & Flat Stomach

Planks are a foundational core exercise that strengthen not only the abs but also the back, shoulders, glutes, and stabilizing muscles.
Unlike traditional crunches, planks work your entire core in a functional, isometric way, improving posture, balance, and overall strength.
They are a staple in bodyweight routines, home workouts, and full-body training programs because they are simple yet highly effective.
Muscles Worked in Planks
- Rectus Abdominis (Front Abs): Helps achieve a toned, flat stomach.
- Transverse Abdominis (Deep Core Muscles): Supports spine stability and prevents lower back pain.
- Obliques: Side core muscles engaged to resist twisting and improve balance.
- Glutes and Lower Back: Stabilize the hips and spine throughout the exercise.
- Shoulders and Chest: Maintain upper body alignment during the plank hold.
Because planks require holding your body in a straight, stable position, they improve endurance and activate multiple muscles simultaneously, making them excellent for core strength, posture, and fat-burning when incorporated into circuits.
How to Perform a Basic Forearm Plank (Step-by-Step)
- Set Up: Lie face down on a mat, then lift your body onto your forearms and toes. Elbows should be directly under your shoulders.
- Engage Core: Pull your belly button toward your spine and squeeze your glutes to maintain a straight line from head to heels.
- Hold: Keep your body rigid and avoid sagging or raising your hips.
- Breath: Breathe steadily and deeply while holding the plank.
- Duration: Start with 20–30 seconds, gradually increasing to 60–90 seconds or more as strength improves.
Form Tips for Maximum Results
- Keep your head neutral; don’t let it drop or crane upward.
- Avoid letting your lower back sag; engage your core and glutes.
- Focus on quality over time—holding the plank with proper form is more effective than holding longer with poor alignment.
- Press your forearms and heels firmly into the floor for stability.
Benefits of Planks
✅ Builds strong, stable core muscles for better posture
✅ Tones abs and supports a flatter stomach
✅ Enhances balance, coordination, and athletic performance
✅ Reduces the risk of lower back pain
✅ Can be modified or intensified to suit any fitness level
Variations to Increase Intensity or Target Different Muscles
- Side Plank: Targets obliques and improves lateral core stability.
- Plank with Shoulder Taps: Engages shoulders, arms, and anti-rotational core strength.
- Plank to Push-Up: Combines core and upper body strength dynamically.
- Leg Lift Plank: Lift one leg at a time to challenge glutes and hamstrings.
- Weighted Plank: Place a small weight plate on your back for added resistance.
When & How Often to Perform Planks
Planks can be performed 3–5 times per week as part of your core, strength, or full-body routine.
Beginners should start with shorter holds, while advanced exercisers can incorporate multiple variations or extended times to continually challenge their core.
Pro Tips for Faster Progress
Combine with cardio and other compound exercises for full-body fat loss and toning.
Include planks at the start of your workout to activate the core or at the end for endurance.
Focus on slow, controlled movements when adding variations.
5. Jumping Jacks for Fast Fat Burning

Jumping jacks are a classic, high-energy cardio exercise that can quickly elevate your heart rate, burn calories, and improve overall endurance.
They are simple to perform, require no equipment, and are perfect for home workouts, warm-ups, or full-body fat-burning routines.
Despite their simplicity, jumping jacks engage multiple muscle groups, making them highly effective for both cardio fitness and fat loss.
Muscles Worked in Jumping Jacks
- Legs (Quadriceps, Hamstrings, and Calves): Work to propel your body off the ground and stabilize your landing.
- Glutes: Engage with each jump to support hip extension and lower-body strength.
- Shoulders and Arms (Deltoids): Lift and control arm movement during each jump.
- Core Muscles (Abs & Obliques): Stabilize your torso and maintain balance throughout the exercise.
This combination of upper and lower body movement with core engagement makes jumping jacks a full-body workout that boosts metabolism, increases cardiovascular endurance, and accelerates fat burning.
How to Perform Jumping Jacks (Step-by-Step)
- Set Up: Stand tall with your feet together and arms at your sides, core engaged.
- Jump Out: Jump your feet out to the sides while simultaneously raising your arms overhead.
- Return: Jump back to the starting position with feet together and arms at your sides.
- Repetitions: Perform continuously for 30–60 seconds for 2–5 sets, adjusting duration based on your fitness level.
Form Tips for Maximum Effectiveness
- Land softly on the balls of your feet to reduce impact on knees and joints.
- Keep your core tight to maintain posture and reduce strain on the lower back.
- Move your arms and legs in sync to maximize full-body engagement.
- Maintain a steady rhythm rather than rushing, ensuring controlled movements.
Benefits of Jumping Jacks
✅ Burns calories quickly for fat loss
✅ Improves cardiovascular health and endurance
✅ Engages multiple muscle groups for total-body toning
✅ Boosts metabolism and energy levels
✅ Can be done anywhere with no equipment
Variations to Increase Intensity
- Star Jumps: Explosive jumping jacks with a higher jump for more power and calorie burn.
- Modified Low-Impact Jacks: Step side-to-side instead of jumping to reduce joint stress.
- Plank Jacks: Perform jumping jacks in a plank position to target core and upper body.
- Cross-Jacks: Cross legs and arms in front of the body with each jump to challenge coordination.
- Weighted Jacks: Hold light dumbbells to increase resistance and strengthen shoulders.
When & How Often to Perform Jumping Jacks
Jumping jacks can be included in daily cardio routines, HIIT workouts, or warm-ups.
For fat-burning purposes, performing them 3–5 times per week in intervals or circuits can help maximize calorie expenditure and improve endurance.
Pro Tips for Faster Results
Focus on landing softly and engaging your core to prevent injury while maximizing effectiveness.
Combine jumping jacks with other compound movements like squats, lunges, or push-ups for a high-intensity circuit.
Maintain consistent intervals and gradually increase duration or intensity to challenge your body.
6. Glute Bridges for a Rounder Butt

Glute bridges are a highly effective lower-body exercise that target the glutes, hamstrings, and core, helping you build a firmer, rounder, and stronger backside.
They are particularly popular for home workouts because they require minimal equipment — just a mat or soft surface — and can be easily modified to increase intensity.
Glute bridges not only sculpt your glutes but also improve hip stability, posture, and athletic performance.
Muscles Worked in Glute Bridges
- Gluteus Maximus: The largest glute muscle, responsible for hip extension and shaping the buttocks.
- Hamstrings: Work synergistically with the glutes during hip extension.
- Core Muscles: Engage to stabilize the pelvis and lower back throughout the movement.
- Lower Back: Supports the spine and improves posture when glutes are properly activated.
- Hip Flexors: Stretched during the upward motion, promoting better mobility.
By focusing on glute activation, glute bridges help correct muscle imbalances caused by prolonged sitting, strengthen the posterior chain, and enhance functional movements like squats, lunges, and running.
How to Perform a Basic Glute Bridge (Step-by-Step)
- Set Up: Lie on your back with knees bent, feet flat on the floor hip-width apart, and arms resting at your sides.
- Engage Core: Pull your belly button toward your spine to stabilize your core.
- Lift Hips: Press through your heels to raise your hips toward the ceiling, forming a straight line from shoulders to knees.
- Pause & Squeeze: Hold at the top for 1–2 seconds, fully engaging your glutes.
- Lower: Slowly lower your hips back down to the floor with control.
- Repetitions: Perform 12–20 reps for 2–4 sets, depending on your fitness level.
Form Tips for Maximum Effectiveness
- Press through your heels, not your toes, to target the glutes more efficiently.
- Avoid arching your lower back; keep your core engaged.
- Squeeze your glutes at the top for maximum contraction.
- Keep your knees aligned with your hips and feet to prevent unnecessary strain.
Benefits of Glute Bridges
✅ Strengthens and tones glutes for a rounder, lifted appearance
✅ Improves hip stability, mobility, and lower back support
✅ Enhances performance in squats, lunges, and running
✅ Reduces risk of lower back pain by activating posterior chain muscles
✅ Can be done anywhere, making it perfect for home workouts
Variations to Increase Intensity or Target Different Muscles
- Single-Leg Glute Bridge: Lift one leg off the ground to challenge balance and isolate each glute individually.
- Elevated Glute Bridge: Place feet on a bench or step for a greater range of motion.
- Glute Bridge with Resistance Band: Add a loop band above the knees to engage the outer glutes and hip abductors.
- Weighted Glute Bridge: Place a dumbbell or barbell across your hips for extra resistance and strength gains.
- Hip Thrust: Perform the movement with your upper back on a bench for maximal glute activation.
When & How Often to Perform Glute Bridges
Glute bridges can be performed 2–4 times per week as part of a lower-body, glute-focused, or full-body routine.
They pair well with squats, lunges, and deadlifts to create a comprehensive posterior chain workout.
Pro Tips for Faster Progress
Incorporate glute bridges into warm-ups or cool-downs to combat hip tightness from prolonged sitting.
Focus on slow, controlled movements to fully engage glutes and prevent momentum taking over.
Combine with other glute activation exercises like clamshells or donkey kicks for maximum shaping.
7. Leg Raises for Lower Abs & Hip Strength

Leg raises are a highly effective exercise for targeting the lower abdominal muscles, hip flexors, and core stabilizers, making them ideal for building a stronger, flatter midsection.
While many ab exercises focus on the upper or middle abs, leg raises specifically engage the lower abs, which are often the most challenging to tone.
This movement also strengthens the hips, improves mobility, and enhances overall core stability — essential for athletic performance and everyday functional movements.
Muscles Worked in Leg Raises
- Lower Rectus Abdominis: Targets the lower portion of the abs for a toned, defined core.
- Hip Flexors (Iliopsoas): Strengthen the hips and improve flexibility and mobility.
- Obliques: Engage to stabilize the torso and prevent swaying during the lift.
- Quadriceps: Assist in keeping the legs straight and controlled throughout the movement.
- Lower Back Stabilizers: Maintain spinal alignment and protect against strain.
By engaging multiple muscles simultaneously, leg raises offer a dual benefit of abs strengthening and hip stabilization, helping with posture, athletic performance, and reducing the risk of lower back injuries.
How to Perform Leg Raises (Step-by-Step)
- Set Up: Lie flat on your back with legs extended and arms resting by your sides or under your glutes for support.
- Engage Core: Press your lower back into the floor and draw your belly button toward your spine.
- Lift Legs: Slowly raise your legs together toward the ceiling while keeping them straight. Lift only as high as you can without arching your lower back.
- Pause & Squeeze: Hold briefly at the top to maximize abdominal engagement.
- Lower with Control: Slowly lower your legs back down without letting them touch the floor completely.
- Repetitions: Perform 12–20 reps for 2–4 sets, adjusting based on your fitness level.
Form Tips for Maximum Effectiveness
- Avoid arching your lower back; maintain constant engagement in the lower abs.
- Move slowly and deliberately to maximize muscle activation and reduce momentum.
- Keep your legs straight, but slight bends in the knees are okay if flexibility is limited.
- Exhale as you lift your legs and inhale as you lower them to maintain proper breathing.
Benefits of Leg Raises
✅ Strengthens lower abs and core stabilizers
✅ Tones the hip flexors and improves lower-body mobility
✅ Enhances posture and spinal stability
✅ Supports functional movements like running, cycling, and climbing stairs
✅ Can be done anywhere with minimal space and no equipment
Variations to Increase Intensity
- Hanging Leg Raises: Perform from a pull-up bar to engage the entire core and upper body stabilizers.
- Reverse Crunches: Focus more on lower abs by curling hips toward the chest.
- Weighted Leg Raises: Hold a dumbbell between your feet for added resistance.
- Flutter Kicks: Alternate small kicks to increase endurance and target lower abs dynamically.
- Leg Circles: Make small controlled circles with raised legs to challenge stability and obliques.
When & How Often to Perform Leg Raises
Leg raises can be performed 2–4 times per week as part of a core, ab, or full-body workout routine.
Pair them with planks, mountain climbers, or glute bridges for a comprehensive core and lower-body strengthening session.
Beginners can start with bent-knee leg raises or partial lifts and progress as strength improves.
Pro Tips for Faster Progress
Combine with cardio and other ab exercises for maximum fat-burning and definition.
Focus on slow, controlled movements rather than speed to fully engage lower abs.
Incorporate deep core engagement and breathing to protect the lower back.
8. Triceps Dips for Toned Arms

Triceps dips are a highly effective bodyweight exercise for targeting the triceps, shoulders, and upper chest, making them ideal for building strong, toned arms.
Unlike exercises that isolate only one muscle, triceps dips engage multiple upper-body muscles simultaneously while improving arm strength, joint stability, and functional fitness.
They can be performed anywhere using a chair, bench, or step, making them perfect for home workouts or gym routines.
Muscles Worked in Triceps Dips
- Triceps Brachii: The primary muscle targeted, responsible for extending the elbow and sculpting the back of the arms.
- Deltoids (Shoulders): Help stabilize and support the movement.
- Pectoralis Major (Upper Chest): Engaged slightly during the lowering and lifting phase.
- Core Muscles (Abs & Obliques): Activated to maintain proper posture and stability.
- Forearms: Assist in gripping the support surface and controlling the movement.
By focusing on the triceps, dips help reduce sagging in the upper arms, enhance definition, and improve pushing strength for daily activities like lifting or pushing objects.
How to Perform Triceps Dips (Step-by-Step)
- Set Up: Sit on the edge of a sturdy chair or bench with hands gripping the edge, fingers facing forward, and feet flat on the floor.
- Position: Slide your hips off the chair, keeping your back close to the bench and legs extended in front of you.
- Lower: Bend your elbows to lower your body toward the floor until your elbows reach about a 90-degree angle.
- Pause & Squeeze: Hold briefly at the bottom to maximize triceps activation.
- Lift: Press through your palms to extend your elbows and return to the starting position.
- Repetitions: Perform 10–15 reps for 2–4 sets, adjusting based on your strength and endurance.
Form Tips for Maximum Effectiveness
- Keep your elbows pointing backward, not flared out to the sides.
- Avoid locking out your elbows at the top to maintain tension in the triceps.
- Keep your shoulders down and away from your ears to prevent strain.
- Maintain a straight torso and engage your core for stability.
Benefits of Triceps Dips
✅ Strengthens triceps, shoulders, and upper chest
✅ Tones and sculpts the back of the arms
✅ Improves upper body strength for functional movements
✅ Can be done at home or in the gym with minimal equipment
✅ Enhances joint stability and muscular endurance
Variations to Increase Intensity or Target Muscles Differently
- Bent-Knee Triceps Dips: Keep knees bent for an easier modification for beginners.
- Elevated Feet Dips: Place feet on a bench or chair to increase resistance and intensity.
- Weighted Dips: Add a plate or dumbbell on your lap for advanced strength training.
- Bench-to-Floor Dips: Perform on a lower surface to challenge balance and range of motion.
- Single-Leg Dips: Extend one leg while performing dips to increase core engagement and difficulty.
When & How Often to Perform Triceps Dips
Triceps dips can be incorporated 2–3 times per week as part of an upper-body, arm-toning, or full-body routine.
They pair well with push-ups, bicep curls, or plank variations for a complete arm and upper-body workout.
Beginners can start with bent-knee dips and gradually progress to full-leg or weighted variations.
Pro Tips for Faster Progress
Include them in circuits with cardio for both fat loss and muscle toning.
Focus on controlled movements rather than speed to fully engage the triceps.
Combine dips with other triceps-focused exercises like overhead extensions or kickbacks.
9. High Knees for Rapid Fat Loss

High knees are a dynamic, high-intensity cardio exercise that rapidly elevates your heart rate, burns calories, and strengthens the lower body.
This simple yet effective movement targets the legs, glutes, and core while improving speed, agility, and cardiovascular endurance.
High knees are perfect for HIIT workouts, warm-ups, or fat-burning circuits, and they require no equipment, making them ideal for home or gym workouts.
Muscles Worked in High Knees
- Quadriceps: Work to lift the knees and power each stride.
- Hamstrings: Assist in leg movement and support explosive motion.
- Glutes: Engage to stabilize the hips and improve lower-body strength.
- Hip Flexors: Strengthen to increase mobility and stride efficiency.
- Core Muscles (Abs & Obliques): Engage to maintain posture, balance, and stability.
- Calves: Assist with quick foot strikes and stabilization during movement.
The combination of lower-body activation and core engagement makes high knees a total-body cardio exercise that effectively burns calories, improves coordination, and enhances athletic performance.
How to Perform High Knees (Step-by-Step)
- Set Up: Stand tall with feet hip-width apart, shoulders relaxed, and core engaged.
- Lift Knees: Drive your right knee toward your chest while lifting the opposite arm in sync.
- Alternate: Quickly switch legs, bringing the left knee up while pumping your right arm.
- Maintain Rhythm: Keep your movements fast and controlled, landing softly on the balls of your feet.
- Duration: Perform continuously for 30–60 seconds, completing 2–5 sets depending on your fitness level.
Form Tips for Maximum Effectiveness
- Keep your chest lifted and shoulders relaxed.
- Engage your core to prevent leaning backward or forward.
- Land lightly on the balls of your feet to reduce impact on knees.
- Pump your arms actively to increase heart rate and overall intensity.
Benefits of High Knees
✅ Burns calories quickly for rapid fat loss
✅ Strengthens legs, glutes, hip flexors, and core
✅ Improves cardiovascular endurance and agility
✅ Enhances coordination, balance, and speed
✅ Requires no equipment and can be done anywhere
Variations to Increase Intensity
- High-Knee Sprints: Perform in place with maximum speed for explosive cardio.
- Weighted High Knees: Hold light dumbbells to challenge arms and increase calorie burn.
- High Knees with Twist: Rotate torso slightly toward the lifted knee to engage obliques.
- Incline High Knees: Perform on a treadmill set at a slight incline for added resistance.
- Burpee High Knee Combo: Combine with a burpee for a full-body, high-intensity circuit.
When & How Often to Perform High Knees
High knees can be performed 3–5 times per week as part of HIIT, cardio, or fat-burning routines.
Beginners can start with shorter intervals, gradually increasing time and intensity to maximize calorie burn and endurance.
Pairing high knees with strength exercises like squats or push-ups creates a complete full-body fat-burning workout.
Pro Tips for Faster Progress
Track intervals with a timer to gradually increase duration and intensity over time.
Focus on maintaining high intensity and proper form to maximize fat-burning.
Incorporate high knees into circuits with other cardio and strength exercises for total-body conditioning.
10. Wall Sit for Leg Endurance & Fat Loss

Wall sits are an isometric exercise that primarily targets the quadriceps, glutes, and hamstrings while improving muscular endurance and lower-body stability.
Unlike dynamic movements, wall sits involve holding a static position, which forces the muscles to sustain tension over time.
This makes them excellent for building strength, toning the legs, and supporting fat loss through increased muscular effort and calorie burn.
Wall sits are simple to perform, require no equipment, and can be easily added to any workout routine.
Muscles Worked in Wall Sits
- Quadriceps: The primary muscles targeted, responsible for holding the bent-knee position.
- Glutes: Engage to stabilize the hips and support proper form.
- Hamstrings: Assist in holding the lower body steady and preventing knee strain.
- Calves: Work isometrically to maintain balance and stability.
- Core Muscles: Engage to keep the torso upright and support spinal alignment.
Holding the wall sit position trains both muscular strength and endurance, making daily activities like climbing stairs, walking, or running easier while promoting lean muscle development in the lower body.
How to Perform a Wall Sit (Step-by-Step)
- Set Up: Stand with your back flat against a wall, feet shoulder-width apart and about two feet from the wall.
- Lower Down: Slide your back down the wall until your knees are bent at approximately a 90-degree angle. Your thighs should be parallel to the floor.
- Hold: Keep your back pressed against the wall, core engaged, and shoulders relaxed.
- Breathing: Breathe steadily throughout the hold, maintaining tension in your legs and glutes.
- Duration: Start with 20–30 seconds and gradually work up to 60–90 seconds or longer. Repeat for 2–4 sets depending on fitness level.
Form Tips for Maximum Effectiveness
- Ensure knees stay directly above ankles and do not extend past your toes.
- Keep your core tight and avoid arching your lower back.
- Maintain even weight distribution on both legs to prevent imbalance.
- Relax your shoulders and avoid hunching forward to protect your neck and spine.
Benefits of Wall Sits
✅ Strengthens quads, glutes, hamstrings, and core
✅ Improves muscular endurance and lower-body stability
✅ Enhances fat-burning through sustained muscle tension
✅ Supports functional movements and reduces risk of knee or hip injuries
✅ Can be done anywhere with no equipment
Variations to Increase Intensity
- Single-Leg Wall Sit: Lift one leg off the ground to challenge balance and isolate each leg.
- Wall Sit with Arm Raises: Lift arms overhead or in front to engage shoulders and increase core activation.
- Weighted Wall Sit: Hold a dumbbell, medicine ball, or plate on your lap for added resistance.
- Ball Wall Sit: Place a stability ball between your back and the wall to reduce strain and enhance glute engagement.
- Marching Wall Sit: Lift one foot slightly at a time while holding the position to challenge coordination and endurance.
When & How Often to Perform Wall Sits
Wall sits can be performed 2–4 times per week as part of a lower-body or full-body routine.
They complement dynamic exercises like squats, lunges, or step-ups by building isometric strength and endurance, helping prevent fatigue during longer workouts or daily activities.
Pro Tips for Faster Progress
Focus on proper alignment to avoid strain on knees or lower back.
Gradually increase hold time to continuously challenge your leg muscles.
Pair wall sits with dynamic leg exercises to maximize calorie burn and toning.
11. Bicycle Crunches for a Slim Waistline

Bicycle crunches are a highly effective core exercise that target the rectus abdominis, obliques, and hip flexors, helping to tone the waistline and strengthen the core.
Unlike standard crunches, bicycle crunches involve a rotational movement, which engages both the upper and lower abs simultaneously while also activating the obliques for a slimmer, more defined midsection.
They are ideal for home workouts, gym routines, or circuit training, requiring no equipment and little space.
Muscles Worked in Bicycle Crunches
- Rectus Abdominis (Front Abs): Engaged with each crunch to flatten and tone the stomach.
- Obliques: Activated through the twisting motion to sculpt the sides of the waist.
- Hip Flexors: Help lift the legs and maintain control during the exercise.
- Lower Back Stabilizers: Support proper posture and prevent strain.
- Quadriceps: Work isometrically to keep the legs elevated and controlled.
Bicycle crunches are particularly effective because they combine rotational and lifting movements, providing both strength and toning benefits for a leaner waist and stronger core.
How to Perform Bicycle Crunches (Step-by-Step)
- Set Up: Lie flat on your back with your hands behind your head and legs lifted, knees bent at 90 degrees.
- Engage Core: Pull your belly button toward your spine and keep your lower back pressed to the floor.
- Twist & Crunch: Bring your right elbow toward your left knee while straightening your right leg.
- Alternate: Switch sides by bringing your left elbow toward your right knee while extending your left leg. Continue alternating in a slow, controlled “pedaling” motion.
- Repetitions: Perform 12–20 reps per side for 2–4 sets, depending on your fitness level.
Form Tips for Maximum Effectiveness
- Avoid pulling on your neck with your hands; let your core do the work.
- Keep movements controlled rather than rushing through reps.
- Maintain a slight bend in the elbows and a neutral neck position.
- Keep your lower back pressed to the floor to prevent strain.
Benefits of Bicycle Crunches
✅ Strengthens upper and lower abs for a toned stomach
✅ Engages obliques to sculpt and slim the waistline
✅ Improves core stability and posture
✅ Enhances coordination and balance through rotational movement
✅ Can be done anywhere with no equipment
Variations to Increase Intensity
- Slow Bicycle Crunches: Perform each rep slowly to increase time under tension.
- Weighted Bicycle Crunches: Hold a small weight behind your head or chest to add resistance.
- Reverse Bicycle Crunches: Focus more on the lower abs by curling hips toward the chest.
- Bicycle Hold: Pause and hold the twisting position at the peak of each rep to intensify the burn.
- Cross-Body Bicycle Crunches: Touch opposite elbow to knee more deliberately to maximize oblique engagement.
When & How Often to Perform Bicycle Crunches
Bicycle crunches can be performed 3–5 times per week as part of a core, abs, or full-body routine.
Beginners can start with fewer reps and slower pacing, gradually increasing speed, repetitions, and sets as strength improves.
Pairing bicycle crunches with planks, leg raises, or cardio exercises helps maximize core definition and fat loss.
Pro Tips for Faster Progress
Gradually increase the number of reps or add resistance to continue challenging your core.
Focus on controlled rotations and engaging the obliques with each twist.
Combine with cardio and a healthy diet for optimal waistline slimming results.
12. Step-Ups for Strong Legs & Glutes

Step-ups are a functional, lower-body exercise that target the quadriceps, glutes, hamstrings, and calves, helping to build strength, tone the legs, and improve balance.
This movement mimics everyday actions like climbing stairs, making it not only effective for muscle development but also for functional fitness.
Step-ups are versatile, require minimal equipment, and can be performed using a sturdy bench, step, or platform, making them ideal for both home and gym workouts.
Muscles Worked in Step-Ups
- Quadriceps: Power the stepping motion and help extend the knee.
- Glutes: Engage to lift the body upward and sculpt the buttocks.
- Hamstrings: Assist in hip extension and stabilize the leg during the step.
- Calves: Support ankle stability and control during ascent and descent.
- Core Muscles: Engage to maintain balance and posture throughout the exercise.
By combining strength, stability, and balance, step-ups are excellent for improving lower-body coordination, endurance, and overall functional strength.
How to Perform Step-Ups (Step-by-Step)
- Set Up: Stand facing a sturdy bench or step with feet hip-width apart.
- Step Up: Place your right foot firmly on the platform, pressing through the heel to lift your body.
- Full Extension: Bring your left foot up to meet your right, standing tall at the top and squeezing your glutes.
- Step Down: Lower your left foot first, then your right, returning to the starting position.
- Alternate Legs: Repeat the movement by starting with the left foot, completing 10–15 reps per leg for 2–4 sets.
Form Tips for Maximum Effectiveness
- Press through your heel rather than your toes to fully engage the glutes.
- Keep your torso upright and avoid leaning forward excessively.
- Engage your core to maintain balance and protect the lower back.
- Step onto a platform that allows a 90-degree bend in the knee for safe, effective movement.
Benefits of Step-Ups
✅ Strengthens quads, glutes, hamstrings, and calves
✅ Tones legs and sculpts the buttocks
✅ Improves balance, stability, and coordination
✅ Supports functional movements like climbing stairs or hiking
✅ Can be modified for all fitness levels and done with or without weights
Variations to Increase Intensity
- Weighted Step-Ups: Hold dumbbells or a kettlebell to increase resistance.
- Knee-Drive Step-Ups: Lift the opposite knee high at the top to engage the core.
- Lateral Step-Ups: Step to the side to target inner and outer thighs.
- Explosive Step-Ups: Perform as a jump to add power and cardiovascular challenge.
- Step-Up with Kickback: Extend the leg backward at the top to further target the glutes.
When & How Often to Perform Step-Ups
Step-ups can be incorporated 2–4 times per week as part of a leg day, glute-focused, or full-body routine.
They pair well with squats, lunges, or deadlifts for a comprehensive lower-body workout.
Beginners should start with bodyweight step-ups and gradually add weight or intensity as strength improves.
Pro Tips for Faster Progress
Gradually increase step height or add resistance to continue challenging your muscles.
Focus on controlled movements and a strong push through the heel to maximize glute engagement.
Combine step-ups with cardio circuits for additional fat-burning benefits.
13. Side-Lunges for Toned Inner Thighs

Side-lunges are a dynamic lower-body exercise that target the inner thighs (adductors), glutes, quads, and hamstrings, helping to tone and strengthen muscles that are often neglected in traditional forward lunges.
They improve hip mobility, balance, and lateral strength, which are crucial for athletic movements, functional fitness, and injury prevention.
Side-lunges are versatile, require minimal space, and can be performed with bodyweight or added resistance such as dumbbells or kettlebells.
Muscles Worked in Side-Lunges
- Inner Thighs (Adductors): Primary muscles activated during the lateral movement, responsible for bringing the legs toward the body.
- Glutes: Engage to stabilize the hips and power the lateral push-back.
- Quadriceps: Work to extend the knee and control the lowering phase.
- Hamstrings: Assist in hip extension and leg stabilization.
- Core Muscles: Engage to maintain posture, balance, and stability throughout the movement.
By incorporating lateral motion, side-lunges strengthen the muscles often underused in forward or backward movements, enhancing overall leg symmetry, functional strength, and flexibility.
How to Perform Side-Lunges (Step-by-Step)
- Set Up: Stand tall with feet hip-width apart, core engaged, and shoulders relaxed.
- Step Out: Take a wide step to the right, bending the right knee while keeping the left leg straight. Lower your hips back and down, keeping your chest lifted.
- Push Back: Press through the heel of the bent leg to return to the starting position.
- Alternate Sides: Repeat the movement on the left side. Perform 10–15 reps per leg for 2–4 sets.
Form Tips for Maximum Effectiveness
- Keep your bent knee aligned over your toes to protect the joint.
- Maintain an upright torso and avoid leaning forward excessively.
- Engage your core for balance and stability throughout the exercise.
- Step wide enough to feel a stretch in the inner thigh, but avoid overextending.
Benefits of Side-Lunges
✅ Tones and strengthens inner thighs and glutes
✅ Improves lateral strength, balance, and hip mobility
✅ Enhances athletic performance in running, jumping, and agility movements
✅ Reduces risk of lower-body injuries by strengthening underused muscles
✅ Can be done anywhere with minimal equipment
Variations to Increase Intensity
- Weighted Side-Lunges: Hold dumbbells or a kettlebell for added resistance and muscle activation.
- Curtsy Side-Lunges: Cross one leg behind the other to target glutes and inner thighs differently.
- Lateral Jump Lunges: Perform with a jump for a plyometric challenge that boosts cardio and explosiveness.
- Side-Lunge with Knee Drive: After stepping back, lift the opposite knee to engage core and hip flexors.
- Crossover Side-Lunges: Step diagonally instead of straight to vary muscle engagement and range of motion.
When & How Often to Perform Side-Lunges
Side-lunges can be incorporated 2–4 times per week as part of a leg, glute, or full-body routine.
They pair well with squats, forward lunges, and step-ups for a comprehensive lower-body workout that targets all angles of the legs.
Beginners should start with bodyweight variations and gradually add resistance as strength and stability improve.
Pro Tips for Faster Progress
Stretch and warm up hips before performing to improve range of motion and prevent injury.
Focus on controlled movements and a strong push-back to maximize inner thigh engagement.
Include side-lunges in circuits with cardio exercises to increase calorie burn and fat loss.
14. Superman Hold for Back & Core Strength

The Superman hold is a bodyweight exercise designed to strengthen the lower back, glutes, and core muscles, promoting better posture, spinal stability, and overall back health.
This exercise is particularly beneficial for those who spend long hours sitting or suffer from mild lower-back weakness, as it targets muscles that are often underused.
It requires no equipment and can be performed anywhere, making it a convenient addition to home or gym workouts.
Muscles Worked in the Superman Hold
- Erector Spinae (Lower Back): Primary muscles targeted, responsible for spinal extension and posture support.
- Gluteus Maximus & Medius: Engage to lift the legs and stabilize the hips.
- Hamstrings: Assist in extending the legs and maintaining alignment.
- Core Muscles (Abs & Obliques): Engage to stabilize the torso and prevent lower back strain.
- Shoulders and Upper Back (Trapezius & Deltoids): Support the arms when extended overhead.
By activating both the posterior chain and core simultaneously, the Superman hold enhances spinal support, posture, and functional strength while reducing the risk of back injuries.
How to Perform the Superman Hold (Step-by-Step)
- Set Up: Lie face down on a mat with arms extended straight in front of you and legs fully extended behind.
- Engage Core: Draw your belly button toward your spine and keep your neck in a neutral position.
- Lift: Simultaneously lift your arms, chest, and legs off the floor as high as comfortably possible.
- Hold: Pause and squeeze your glutes, lower back, and shoulders for 15–30 seconds.
- Lower: Slowly lower your limbs back to the starting position with control.
- Repetitions: Perform 2–4 sets, gradually increasing hold time as strength improves.
Form Tips for Maximum Effectiveness
- Keep your neck neutral by looking slightly ahead, not straining upward.
- Avoid overextending to prevent discomfort in the lower back.
- Engage your glutes and core to reduce pressure on the spine.
- Maintain controlled breathing throughout the hold.
Benefits of the Superman Hold
✅ Strengthens lower back, glutes, and core muscles
✅ Improves posture and spinal alignment
✅ Enhances functional strength for everyday activities
✅ Reduces risk of lower-back pain and injuries
✅ Can be done anywhere with no equipment
Variations to Increase Intensity
- Alternating Superman: Lift opposite arm and leg simultaneously, alternating sides to challenge stability.
- Weighted Superman: Hold light dumbbells or resistance bands in hands for added resistance.
- Superman Pulse: Perform small, controlled pulses at the top to increase time under tension.
- Superman Hold with Arm Circles: Make small circular motions with the arms while holding to engage shoulders and upper back.
- Extended Hold: Gradually increase hold time to 45–60 seconds for endurance and strength gains.
When & How Often to Perform the Superman Hold
The Superman hold can be performed 2–3 times per week as part of a back, core, or full-body workout routine.
It pairs well with exercises like planks, glute bridges, and bird-dogs for a complete posterior chain strengthening session.
Beginners can start with shorter hold times and progress as back and glute strength improves.
Pro Tips for Faster Progress
Combine with stretching to improve flexibility and prevent stiffness.
Focus on controlled lifts and sustained contraction to maximize muscle activation.
Incorporate into warm-ups or cool-downs to engage the posterior chain.
15. Calf Raises for Strong & Toned Legs

Calf raises are a simple yet highly effective exercise that target the gastrocnemius and soleus muscles of the lower leg, helping to build strength, tone, and definition in the calves.
Strong calves are essential not only for aesthetics but also for improving balance, stability, and athletic performance, as they play a key role in movements like running, jumping, and walking.
Calf raises can be performed anywhere, with or without equipment, making them a versatile addition to both home and gym workouts.
Muscles Worked in Calf Raises
- Gastrocnemius: The larger, visible muscle of the calf, responsible for plantar flexion and the classic “bulging” shape.
- Soleus: Lies beneath the gastrocnemius and contributes to endurance and stability.
- Tibialis Anterior (to a lesser extent): Helps stabilize the ankle during movement.
- Core Muscles: Engage slightly to maintain posture and balance during the exercise.
By consistently training the calves, calf raises improve lower-leg strength, ankle stability, and overall lower-body performance, reducing the risk of injuries during daily activities or sports.
How to Perform Calf Raises (Step-by-Step)
- Set Up: Stand tall with feet hip-width apart, toes facing forward. Use a wall, chair, or railing for balance if needed.
- Lift: Press through the balls of your feet to raise your heels as high as possible, fully contracting the calves.
- Pause & Squeeze: Hold the top position for 1–2 seconds to maximize muscle engagement.
- Lower: Slowly lower your heels back down, maintaining control to stretch the calves.
- Repetitions: Perform 15–25 reps for 2–4 sets, adjusting based on fitness level.
Form Tips for Maximum Effectiveness
- Maintain a straight posture with shoulders back and core engaged.
- Avoid bouncing; perform each lift and lower with controlled movement.
- Keep feet hip-width apart for standard calf activation or vary stance for different muscle emphasis.
- Ensure full range of motion by lifting as high as possible and lowering fully.
Benefits of Calf Raises
✅ Strengthens and tones the calves for improved lower-leg aesthetics
✅ Enhances ankle stability and balance
✅ Improves performance in running, jumping, and other athletic activities
✅ Can be done anywhere with no equipment
✅ Supports functional strength for daily movements
Variations to Increase Intensity
- Single-Leg Calf Raises: Perform on one leg to challenge balance and increase intensity.
- Weighted Calf Raises: Hold dumbbells or wear a weighted vest for added resistance.
- Elevated Calf Raises: Stand on a step or platform to increase range of motion and stretch the calves.
- Seated Calf Raises: Focus on the soleus muscle by performing while seated with weight on the knees.
- Pulse Calf Raises: Add small pulses at the top of the lift to increase time under tension and endurance.
When & How Often to Perform Calf Raises
Calf raises can be performed 2–4 times per week as part of a leg, lower-body, or full-body routine.
They complement exercises like squats, lunges, and step-ups for complete lower-leg development.
Beginners should start with bodyweight calf raises and progress to weighted or elevated variations as strength improves.
Pro Tips for Faster Progress
Incorporate into warm-ups, circuits, or cool-downs to strengthen and stretch calves consistently.
Focus on slow, controlled movements to maximize muscle activation and prevent injury.
Combine calf raises with balance or plyometric exercises to improve lower-leg power.

1. How often should I perform these exercises to see results?
For optimal results, aim to perform these exercises 3–5 times per week, combining strength, core, and cardio movements.
Consistency is key—regular workouts along with a balanced diet will accelerate fat loss, muscle toning, and overall fitness improvements.
Beginners can start with fewer sessions and gradually increase frequency.
2. Do I need equipment for these exercises?
Most of these exercises are bodyweight-friendly and require minimal or no equipment.
For some movements, you can enhance intensity with dumbbells, resistance bands, or benches, but exercises like planks, high knees, wall sits, and bicycle crunches can be performed entirely at home without equipment.
3. How long does it take to see visible results?
Results vary depending on your fitness level, diet, and consistency, but many people start noticing improved strength, tone, and endurance within 4–6 weeks.
For visible fat loss, combining these exercises with cardio and a calorie-controlled diet can accelerate progress.
4. Can I combine these exercises with my current workout routine?
Absolutely. These exercises are highly versatile and can be incorporated into full-body circuits, HIIT routines, or split workouts.
They complement squats, lunges, push-ups, and cardio workouts to create a balanced training plan that targets multiple muscle groups.
5. Are these exercises safe for beginners?
Yes. Most exercises on this list can be modified for beginners.
For example, bent-knee triceps dips, slower high knees, or shorter wall-sit durations make the movements easier.
Start gradually, focus on proper form, and increase intensity over time to avoid injury.
6. How do I prevent injuries while performing these exercises?
To minimize the risk of injury:
- Warm up before starting your workout.
- Use proper form and controlled movements.
- Engage your core to stabilize joints and protect your spine.
- Progress intensity gradually, especially when adding weights or resistance.
7. Can these exercises help with fat loss?
Yes. Exercises like high knees, jumping jacks, step-ups, and mountain climbers increase heart rate and calorie burn, contributing to fat loss when combined with a healthy diet.
Strength-focused exercises like squats, lunges, and wall sits build lean muscle, which also enhances metabolism.
8. Do I need to follow a specific order for these exercises?
Not necessarily. You can create full-body circuits by mixing strength, core, and cardio exercises or focus on specific muscle groups on different days. For example:
- Leg day: Squats, lunges, step-ups, calf raises
- Core day: Planks, bicycle crunches, leg raises, Superman hold
- Full-body/cardio day: High knees, jumping jacks, mountain climbers, burpees
9. How many repetitions or sets should I do?
Repetitions and sets depend on your fitness level:
- Beginners: 8–12 reps per set, 2–3 sets
- Intermediate: 12–20 reps per set, 3–4 sets
- Advanced: 15–25+ reps or longer duration holds, 4–5 sets
For isometric exercises like planks, wall sits, or Superman holds, aim for 20–60 seconds per set and gradually increase hold time.
10. Can I do these exercises at home without a lot of space?
Absolutely. Most exercises, such as planks, bicycle crunches, high knees, wall sits, and triceps dips, require minimal space.
For movements like step-ups, use a sturdy step or bench, and for lunges or squats, ensure enough room to move safely.
11. Should I combine these exercises with cardio for best results?
Yes. While strength and bodyweight exercises tone muscles and build endurance, adding cardio sessions like running, cycling, or brisk walking enhances fat-burning, cardiovascular health, and overall calorie expenditure.
12. Can women and men benefit equally from these exercises?
Absolutely. These exercises are effective for all genders, promoting fat loss, muscle toning, and functional strength.
Adjust intensity, weight, and repetitions according to individual fitness levels and goals

Final Thoughts
Creating a strong, toned, and resilient body doesn’t have to mean hours in a crowded gym or expensive equipment.
The 15 exercises covered in this guide—from squats and lunges to bicycle crunches, wall sits, and calf raises—offer a comprehensive, full-body approach that targets every major muscle group while also improving balance, core stability, and cardiovascular endurance.
These exercises are highly versatile, allowing beginners and advanced fitness enthusiasts alike to customize intensity, repetitions, and variations based on their personal goals.
For example, bodyweight movements can be performed anywhere, while the addition of dumbbells, resistance bands, or step platforms can enhance strength, tone, and calorie burn.
Key Takeaways from These Exercises:
- Lower-Body Strength: Squats, lunges, step-ups, side-lunges, and calf raises sculpt and tone the legs and glutes while improving stability and functional movement.
- Core Development: Planks, bicycle crunches, leg raises, and Superman holds strengthen the abs, obliques, and lower back, promoting better posture and a flatter midsection.
- Upper-Body Toning: Push-ups, triceps dips, and arm variations build lean muscle in the chest, shoulders, and arms.
- Fat-Burning & Cardio Boost: High knees, jumping jacks, and mountain climbers elevate heart rate, increase calorie burn, and improve endurance.
- Balance & Stability: Wall sits, side-lunges, and core exercises enhance control, coordination, and injury prevention, essential for both daily activities and athletic performance.
Why Consistency and Proper Form Matter:
The effectiveness of these exercises comes from performing them consistently with proper form.
Slow, controlled movements, attention to posture, and gradual progression in intensity will maximize results while minimizing the risk of injury.
Pairing this exercise routine with a balanced diet, adequate hydration, and quality sleep ensures optimal fat loss, muscle growth, and overall health.
Scalability & Adaptability:
Whether your goal is fat loss, muscle toning, strength building, or overall fitness, these exercises can be adapted to meet your needs.
Beginners can start with bodyweight variations, while advanced trainees can increase resistance, incorporate time-under-tension strategies, or combine exercises into high-intensity circuits.
The versatility ensures that your workouts remain challenging, engaging, and effective over time.