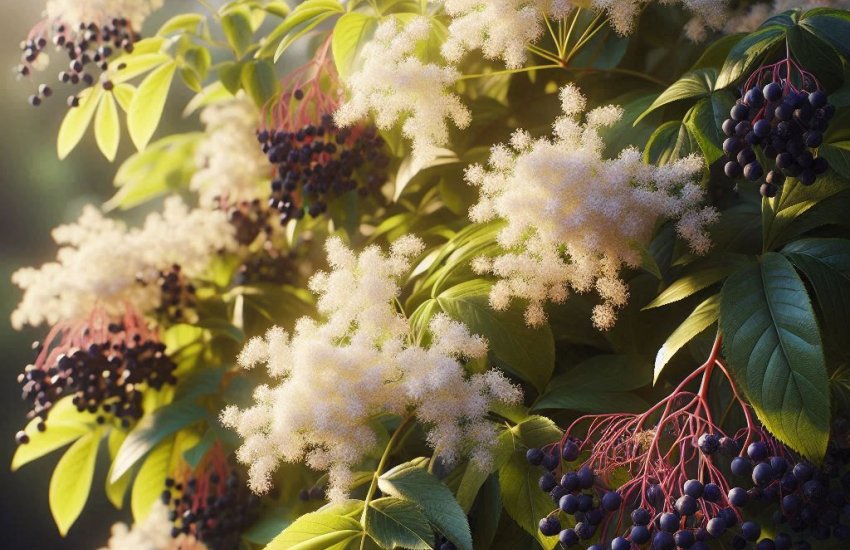

Understanding what are the ideal growing conditions for elderberry plants is key to cultivating these versatile and beneficial shrubs successfully. Elderberries are not only prized for their beautiful clusters of creamy white flowers and dark purple berries, but also for their traditional medicinal uses and culinary applications in jams, pies, and wines. While relatively adaptable, providing the right environment will ensure a prolific harvest and a robust, healthy plant for years to come.
What Kind of Climate and Sunlight Do Elderberry Plants Prefer?
Elderberry plants are quite adaptable, but they certainly have preferences when it comes to the climate and the amount of sun they receive.
Climate and Hardiness Zones
- Broad Adaptability: Most common elderberry species, especially American elderberry (Sambucus canadensis) and European elderberry (Sambucus nigra), are remarkably adaptable to a wide range of climates.
- Hardiness Zones: They thrive in USDA Hardiness Zones 3-9, which covers a significant portion of North America.
- Cold Tolerance: They are quite cold-hardy, tolerating winter temperatures well below freezing. Some varieties are even hardy to Zone 2.
- Heat Tolerance: While they prefer cooler climates, many varieties can handle the heat of Zone 9, provided they receive adequate moisture and some afternoon shade.
- Chilling Hours: Elderberries require a certain number of chilling hours (hours below 45°F or 7°C) during winter to break dormancy and produce fruit. This is typically 400-800 hours, making them well-suited for temperate climates with distinct winters.
Sunlight Requirements
Elderberry plants are flexible regarding sunlight, but their fruiting potential is directly tied to the amount of sun they get.
- Full Sun is Ideal: For the best possible berry production, plant elderberries in a location that receives at least 6-8 hours of direct sunlight per day.
- Benefits of Full Sun: More sunlight leads to more flowers, which in turn means a larger and sweeter berry harvest. It also promotes denser growth and stronger plants.
- Partial Sun Tolerance: Elderberries can tolerate partial sun (4-6 hours of direct sunlight), especially in warmer climates where protection from intense afternoon sun can prevent stress.
- Impact in Partial Sun: While they will still grow and produce some berries, the yield will likely be reduced, and the plant may be leggier.
- Avoid Full Shade: Do not plant elderberries in full shade (less than 4 hours of direct sun).
- Impact in Full Shade: They will become very leggy, produce very few if any flowers or berries, and may be more susceptible to disease.
- Morning Sun is Best: If you are in a hot climate and your site only offers partial sun, ensure it’s morning sun, which is gentler. Afternoon shade can be beneficial in scorching regions.
What Type of Soil and Water Conditions Do Elderberry Plants Need?
Soil and water are crucial factors for the health and productivity of elderberry plants. They prefer conditions that mimic their natural wetland and woodland edge habitats.
Soil Preferences
- Adaptability: Elderberries are famously adaptable to a wide range of soil types, from sandy to clay, but they have a strong preference for certain characteristics.
- Ideal Soil pH: They thrive in slightly acidic to neutral soil, with a pH between 5.5 and 7.0. A soil test kit can help you determine your soil’s current pH. If your soil is too acidic, you can add garden lime to raise the pH; if too alkaline, add elemental sulfur or peat moss to lower it.
- Rich in Organic Matter: Elderberries prefer fertile soil rich in organic matter. This is perhaps the most important soil characteristic.
- Benefits: Organic matter improves soil structure, enhances drainage while simultaneously increasing water retention, and provides a slow release of nutrients.
- Amending Soil: Before planting, generously amend the soil with well-rotted compost or aged manure. This provides the ideal environment for their roots.
- Well-Drained but Moist: This seemingly contradictory requirement is key. Elderberries hate “wet feet” (roots sitting in stagnant water) but love consistent moisture.
- Good Drainage: The soil must drain excess water away, preventing root rot. If you have heavy clay, amending with compost will help. Consider a raised garden bed if drainage is a significant issue.
- Moisture Retention: Despite good drainage, the soil should be able to hold onto moisture. Organic matter helps achieve this balance.
Watering Requirements
- Consistent Moisture, Especially When Young: Elderberries need consistent moisture, particularly during their first year of establishment and throughout their fruiting season.
- New Plants: Water new elderberry plants deeply and regularly (1-2 times per week, or more in hot, dry weather) to help them establish a strong root system.
- Mature Plants: Once established, elderberries are more tolerant of varying moisture levels, but they will produce more berries if they receive consistent water, especially during dry spells and when berries are forming. Aim for about 1 inch of water per week from rain or irrigation.
- Avoid Drought Stress: Prolonged drought can stress the plants, leading to reduced berry production, wilting, and overall weakened health.
- Avoid Waterlogging: As mentioned, prolonged standing water or consistently soggy soil will lead to root rot and plant death. Good drainage is paramount.
- Mulching: Applying a 2-4 inch layer of organic mulch (like wood chips, shredded bark, or straw) around the base of the elderberry plants is highly beneficial.
- Benefits of Mulch: It helps retain soil moisture, suppresses weeds (which compete for water and nutrients), and moderates soil temperature. As it breaks down, it also adds valuable organic matter to the soil. Keep mulch a few inches away from the main stems to prevent rot.
Do Elderberries Need Cross-Pollination for Fruit Production?
Understanding elderberry pollination is crucial for maximizing your berry harvest. Many varieties benefit from or require cross-pollination.
Self-Fertile vs. Self-Pollinating
- Self-Fertile: This means a plant can produce fruit with its own pollen. However, for elderberries, “self-fertile” often doesn’t mean “self-pollinating to max potential.”
- Self-Pollinating: While some elderberry varieties are technically self-fertile, they generally produce significantly higher yields when cross-pollinated by a different variety. This is due to a phenomenon called self-incompatibility or simply improved pollination efficiency with genetically different pollen.
The Importance of Cross-Pollination
- Increased Yields: Planting at least two different varieties of elderberry will dramatically increase your fruit production. The presence of genetically different pollen stimulates more successful fertilization of the flowers.
- Larger Berries: Cross-pollination can also lead to larger, healthier berries.
- Reliability: It ensures a more reliable harvest, even if one variety has a less successful bloom year.
How to Ensure Cross-Pollination
- Plant Multiple Varieties: The simplest and most effective way is to plant at least two different elderberry cultivars. For example, plant a ‘Bob Gordon’ elderberry alongside an ‘Adams’ elderberry, or ‘York’ with ‘Nova’. Many nurseries and online retailers offer elderberry plant varieties.
- Proximity: Plant the different varieties within about 50-60 feet of each other to allow pollinators (bees, flies, wind) to easily transfer pollen between them.
- Flowering Times: Ensure the chosen varieties have overlapping flowering times. Most common elderberry cultivars have similar bloom windows, so this is usually not a major issue.
Pollinators
- Insect Pollination: Elderberry flowers are primarily pollinated by insects, especially various types of bees, flies, and beetles, attracted by the abundant pollen and nectar.
- Attracting Pollinators: Ensure your garden is hospitable to pollinators by avoiding broad-spectrum pesticides and providing other flowering plants.
What Are the Nutritional Needs and Fertilization for Elderberries?
While elderberries are not extremely heavy feeders, providing adequate nutrition, especially for young plants and those in poor soil, will support vigorous growth and abundant fruit.
Initial Fertilization (at Planting)
- Compost is Key: As mentioned, mixing plenty of well-rotted compost into the planting hole and surrounding soil provides a slow-release source of nutrients.
- Avoid High-Nitrogen Fertilizers: Do not apply synthetic, high-nitrogen fertilizers directly into the planting hole when planting bare-root elderberries, as this can burn delicate roots.
- Bone Meal (Optional): Some gardeners add a handful of bone meal to the bottom of the planting hole for a slow-release boost of phosphorus, which supports root development.
Established Plants
- Annual Fertilization: Once established (after the first year), elderberries benefit from an annual application of fertilizer in early spring, just as new growth begins.
- Type of Fertilizer:
- Balanced Organic Fertilizer: A balanced, slow-release organic granular fertilizer is ideal. Look for a product with an N-P-K ratio like 5-5-5 or similar, designed for fruiting plants or general shrubs. An organic berry fertilizer is often suitable.
- Compost Tea: Drenching the soil with compost tea can provide a gentle nutrient boost and microbial activity.
- Aged Manure: A top-dressing of well-aged composted manure (from chickens, cows, or horses) in spring or fall is an excellent natural fertilizer.
- Application Rate: Follow the product instructions for the recommended dosage based on the plant’s size. Generally, scatter it around the drip line (the outer edge of the plant’s branches) and gently work it into the top inch or two of soil, then water thoroughly.
- Soil Amendments: If your soil test indicates specific deficiencies (e.g., low phosphorus or potassium), you can apply targeted amendments like rock phosphate or greensand to correct them.
What to Avoid
- Excess Nitrogen: While nitrogen promotes leafy growth, too much can reduce flowering and fruiting. Avoid heavy applications of high-nitrogen lawn fertilizers near elderberries.
- Fertilizing in Late Season: Avoid fertilizing after mid-summer, as this can stimulate new growth that won’t have time to harden off before winter, making the plant more susceptible to cold damage.
What Are Common Pests and Diseases of Elderberry and How to Prevent Them?
Elderberries are generally hardy and resistant to many problems, but like any plant, they can encounter some pests and diseases. Providing ideal growing conditions is the first line of defense against these issues.
Common Pests
-
Aphids:
- Symptoms: Small, soft-bodied insects clustered on new growth, distorted leaves, sticky honeydew.
- Prevention/Control:
- Strong Water Spray: A strong spray of water can dislodge them.
- Beneficial Insects: Encourage ladybugs and lacewings, which are natural predators.
- Neem Oil: Apply neem oil spray (organic and effective).
- Insecticidal Soap: A targeted spray of insecticidal soap can also work.
-
Elderberry Borers (Longhorned Beetles):
- Symptoms: Wilting branches, holes in stems, sawdust-like frass (excrement) near holes, stems breaking easily.
- Prevention/Control:
- Pruning: Prune out and destroy (burn or bag) any infested branches immediately.
- Healthy Plants: Maintain plant vigor through good cultural practices, as healthy plants are more resistant.
- No Chemicals: Chemical controls are generally not effective or recommended for borers.
-
Japanese Beetles:
- Symptoms: Skeletonized leaves (chewing between veins, leaving only a lacy network).
- Prevention/Control:
- Hand-Picking: For small infestations, hand-pick beetles in the morning and drop them into soapy water.
- Row Covers: For young plants, use floating row covers.
- Neem Oil: Can deter feeding.
- Traps: Japanese beetle traps can sometimes attract more beetles than they catch, so use with caution and place far from susceptible plants.
Common Diseases
-
Powdery Mildew:
- Symptoms: White, powdery fungal growth on leaves and stems.
- Prevention/Control:
- Good Air Circulation: Ensure plants are spaced adequately and prune to improve airflow.
- Sunlight: Adequate sunlight (full sun preference) helps reduce mildew.
- Resistant Varieties: Choose resistant varieties if available.
- Fungicides: Organic fungicides like potassium bicarbonate spray or neem oil can help.
-
Canker:
- Symptoms: Sunken, discolored lesions on stems, often with cracking bark. Can cause branches to wilt and die back.
- Prevention/Control:
- Pruning: Prune out infected branches promptly, cutting back to healthy wood. Disinfect pruning tools between cuts.
- Avoid Injury: Prevent wounds to stems, as these are entry points for fungal spores.
- Good Health: Healthy, unstressed plants are less susceptible.
-
Leaf Spot:
- Symptoms: Various spots or blotches on leaves, often brown or black, caused by different fungi.
- Prevention/Control:
- Sanitation: Remove and destroy infected leaves in the fall.
- Air Circulation: Ensure good air movement through the plant.
- Watering: Water at the base of the plant to keep foliage dry.
- Fungicides: Rarely necessary for minor leaf spot, but organic options exist for severe cases.
General Prevention Strategies
- Choose Healthy Plants: Start with disease-free nursery stock from a reputable source.
- Provide Optimal Conditions: The most effective defense against pests and diseases is a healthy, vigorous plant. Ensure proper sunlight, soil, water, and nutrients.
- Regular Inspection: Frequently inspect your elderberry plants for any signs of trouble. Early detection makes control much easier.
- Sanitation: Clean up fallen leaves and plant debris around the base of the plant, especially in fall, to remove overwintering pests and disease spores.
- Prune Dead/Diseased Wood: Annually prune out any dead, damaged, or diseased branches to improve plant health and airflow.
By understanding what are the ideal growing conditions for elderberry plants and providing consistent care, you can enjoy abundant harvests and the beautiful presence of these resilient shrubs in your garden for many years.