This is the journey of how we installed Marazzi spice wood look tile throughout our 2600 sf home with professional looking results. We researched. We bargain shopped. We shed blood, sweat, and tears…literally. Now we have an awesome looking floor to show for all our efforts.
*UPDATE* I have moved! In 2021 I self-contracted a custom home and I have documented this amazing journey on TIKTOK and Instagram. Below is the white oak and tile combo we did in the new entry way. Scroll down to read about the previous home and wood look tile installation.


Okay, back to wood look tile installation!

We saved thousands doing this project ourselves, even though it took us 4 months to complete 2600 sf of tile, I’m glad we have gained the knowledge and skill.
- Materials:
- Marazzi wood look tile – purchased at a discount from Surplus Building Materials
- we saved $4-5 / sf on this material over retail prices. Even wholesale was $3.83 from Marazzi. We purchased it for $1.99/sf and even with shipping it was less than wholesale.
- 18″ travertine – Purchased from Floor and Decor
- Rubi tile level kit
- Mapei Ultrafloor Plus Gray Mortar
- use white for travertine and grey for non porous dark tile
- Mapei Flexcolor CQ grout in Black
- Self Leveling compound and concrete primer
- Long level and screed board
- Air compressor and air hammer chisel
- Sledge hammer
- Plastic bins and cardboard boxes to haul sharp tile debris
- shop vac
- Tile Wet Saw
- Knee pads, 1/2″ trowel, and grout float
- Marazzi wood look tile – purchased at a discount from Surplus Building Materials
THE BEFORE:
The first step was removing all the old tile. This was an arduous process considering we had a lot of tile in the main part of the house. Below are some BEFORE shots of our entry and kitchen from a few years ago…way before any remodeling was done.


We used the air hammer and air compressor along with a sledge hammer to bust up the old tile. My husband said the “easiest” thing was to break up the tile with a sledge hammer and then use the air hammer to chisel the old mastic off the slab… I was on clean up duty as he finished each section I would gather the trash and vacuum the debris. It was a dirty and dusty job. It took us about two weeks working evenings and weekends to remove all the tile from the main 1000 sf area in our house. Finally, when it was done we were able to move onto prepping the slab for tile.


LEVELING THE FLOOR:
Leveling the floor was one of the hardest parts of this project and in some ways the most time consuming. “Level” floors aren’t really a necessity for tile, but FLAT floors are extremely important. For wood look tile, most manufacturers recommend the floor be flat within 1/16 of an inch over 10 feet. That’s unbelievably flat. I doubt our floors were that perfect, but we did the best we could. With such a large area to tile, the ideal way is to pour self leveling compound on the entire surface, but you’d basically have to move out to cover the entire slab in one massive pour. With that not being a practical option, we decided to mark the low spots and see how bad it was.
To determine where the low spots were we used a long 6 foot level and a crayon to mark the edges of the low spots. So basically the slab looked like a giant grey area with crayon circles drawn everywhere when we were done.
After determining where the Self-Leveling compound needed to be poured, we used two different brands of self leveling compound (Sika and LevelQuik) and found they really worked just as well for our purposes. The cheaper brands weren’t as smooth on the surface, but that didn’t create any issues when tiling. As my husband poured the mix, I used a screed board to feather the edges, which is a lot harder than it sounds over large areas. In smaller spots I was able to use a trowel. We’d usually do one room at a time and then wait for it to dry, check for flatness and repeat if necessary. In the photo below, I’m using my straight board and level to check for flat and level across a long distance. You can see we still have some areas to fix where the board isn’t touching.

TILING:
I think we chose to start in the most difficult area first. but we had no choice. I snapped a chalk line along the middle of the house from the front door to the back wall. The way our floor plan is laid out you can see directly back to the back of the house from our front door, so the tile had to be laid along that straight line first. You don’t want people standing in your entry and seeing wavy tile lines all the way back!
The entry way was where we wanted to put travertine and wood look tile in a basket weave pattern so this further complicated things. After sketching and measuring the pattern several times, it was time to start. My husband made cuts while I laid the tile and this seemed to work well for us.


I started my first diamond travertine tile on the center line leaving room for the wood look border…and down the line we went completing the entry way pattern. Laying the tile wasn’t as hard as I thought it would be and having ultra flat floors made it easier. I used a 1/2″ trowel and Mapei heavy tile mortar that doesn’t allow the tile to sag or collapse under it’s own weight. Another thing that made installation a bit more forgiving is the Rubi Tile Level system. This system helps you get a perfectly flat floor and basically holds the tile edges in place until they dry. Those are the white “cups” you see in the photo below.

I was going very slow at first, allowing several tiles to dry before continuing so that my pattern didn’t get crooked. We chose to do 1/16 grout lines, so going slow at first was a necessity to get all the cuts and edges lined up perfectly. One thing that made starting and stopping easier was cleaning up the edges of the tile so there was no mastic left to dry on the concrete. I also slipped the next tile spacer under the edges of the tile before they dried (the grey “sticks” in the picture above) so I could come back to it later.


You can see my husband’s “tent” in the photo below. This was useful since we were cutting tile at many late hours and couldn’t run the tile saw at all hours of the night outside and disturb the neighbors. The tent helped confine the mess and keep the concrete slab dry.

KEEPING THINGS STRAIGHT:
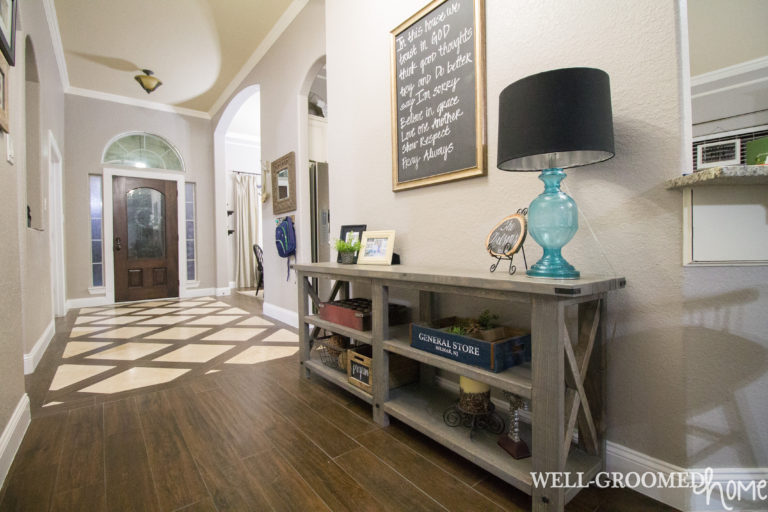
After completing the entry it was time to work down that chalk line to the back part of the house. Slow and steady I went to make sure my tiles weren’t spinning or floating off the line. We decided to lay our tile like wood, meaning we used the cut pieces at each row to start the next row resulting in a random board pattern, rather than a distinctly tile-like pattern. Many installers who lay wood look tile do so in a very organized tile-like brick or offset pattern, which makes it instantly look like tile. I wanted more of a wood-type installation, so random is the pattern here.
Another thing to consider with these long plank-type tiles is that they have a natural bow or curve to them which can result in a lot of lippage. Lippage is where one tile is higher or lower than the one next to it. When tiles are off set by more than 30% the natural bowing of each tile makes lippage appear even worse. This is the final reason we chose to do a random pattern and avoid off setting the tiles by more than 30%. The Rubi Tile Level system also helps a great deal with lippage too.
It took us quite a bit of time to get the first 1000 sf done in the main part of the house. Of course, my toddler and then getting sick from my autoimmune disease made us take longer too, but we started in August and finished all 2600 sf before Christmas.

GROUTING:
Once each room was complete it was time to grout. I did a lot of research on grout and I knew I wanted black grout since our tile is semi dark. I ended up choosing Mapei Flexcolor CQ which is a quartz pre-mixed grout that is color consistent, stain proof and water proof once it’s dry. It’s easy to work with and even comes with a sponge that you’ll definitely want to use for best results. I also loved that it was non staining and didn’t make everything else black during the grouting process, as well. I could grout a few feet at a time and close up the bucket, tend to my son, cook dinner or whatever, and come right back to it without all the washing and waiting that traditional grout requires.

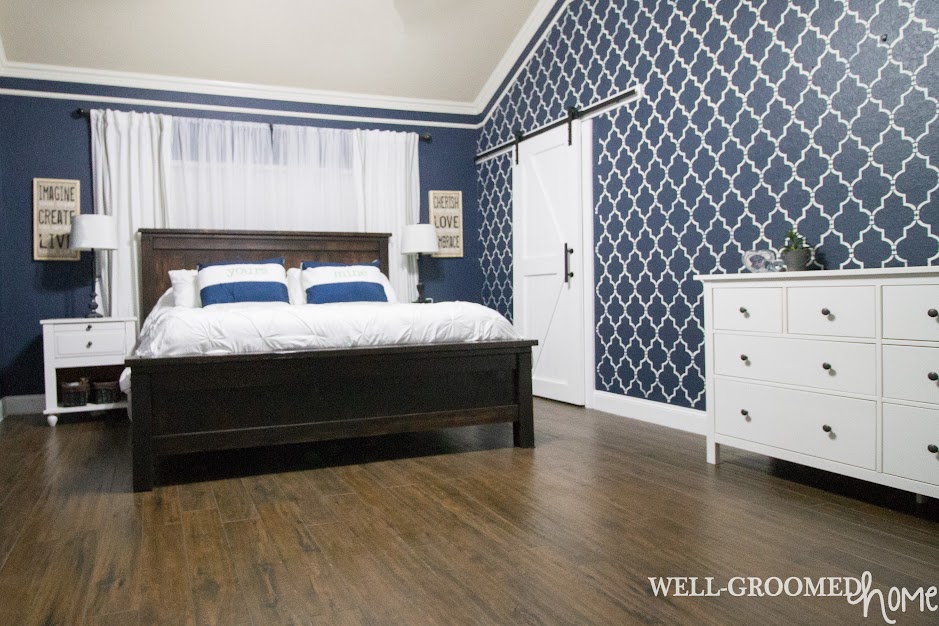
The final result is a floor that’s pretty impervious to damage. My toddler can run his cars and trucks all over it without fear it will scratch like real hardwood floors. Water isn’t an issue either, so wet feet at the door or mud from the back yard don’t have to be immediately wiped up (although I’m too OCD to let it stay there lol).
More pictures will be added soon so check back and follow me on http://facebook.com/wellgroomedhome to see the latest!