I’ve tested a bunch of online course platforms before I started selling my courses.
Thinkific was the best one out of the bunch.
As a solopreneur with a relatively small audience and no team behind me, it was a perfect choice for me.
Building a course is easy. Just record, drag and drop, and that’s it.
Thinkific handles all the payments, refunds, discounts, and even affiliate programs.
So all that’s left for you is just creating courses and promoting them to your people.
In this post, I’ll give my review of Thinkific. I’ll show you what it’s been like for almost 3 years that I’ve been using it. I’ll share my pros and cons and more.
Let’s go!
Disclaimer: This article is reader-supported. If you choose to pay for the tools listed in this article, I might earn a small commission at no cost to you.
Core Features
Before I show you how I use Thinkific and what my experience has been like, here’s a quick look at what the platform can do:
- Course Creation Tools: You can build courses with videos, quizzes, and interactive lessons.
- Custom Website: Create a professional, branded website to host your courses.
- Marketing and Sales Tools: Run coupons, promotions, affiliate programs, and connect your email marketing tools to help drive sales.
- Memberships and Subscriptions: Sell your courses as one-time purchases or include them in a membership or subscription plan.
- Quizzes and Surveys: Add quizzes and surveys to make learning more interactive and get feedback from students.
- Drip Content: Schedule your lessons to release over time so students keep coming back.
- Secure Hosting: All your course content is safely stored in the cloud and available anytime.
- Analytics and Reports: Get insights on your course performance, engagement, and sales.
- Integrations: Connect Thinkific with tools like Zoom, Stripe, PayPal, and your email marketing apps for more features.
- Student Management: Track student progress, manage enrollments, and provide support through forums and direct messages.
My Experience
I’ve been using Thinkific for almost a year now and have launched (and sold) two different courses on it.
Let me walk you through the platform step by step from a course creator’s point of view.
Thinkific Course Creation Tools
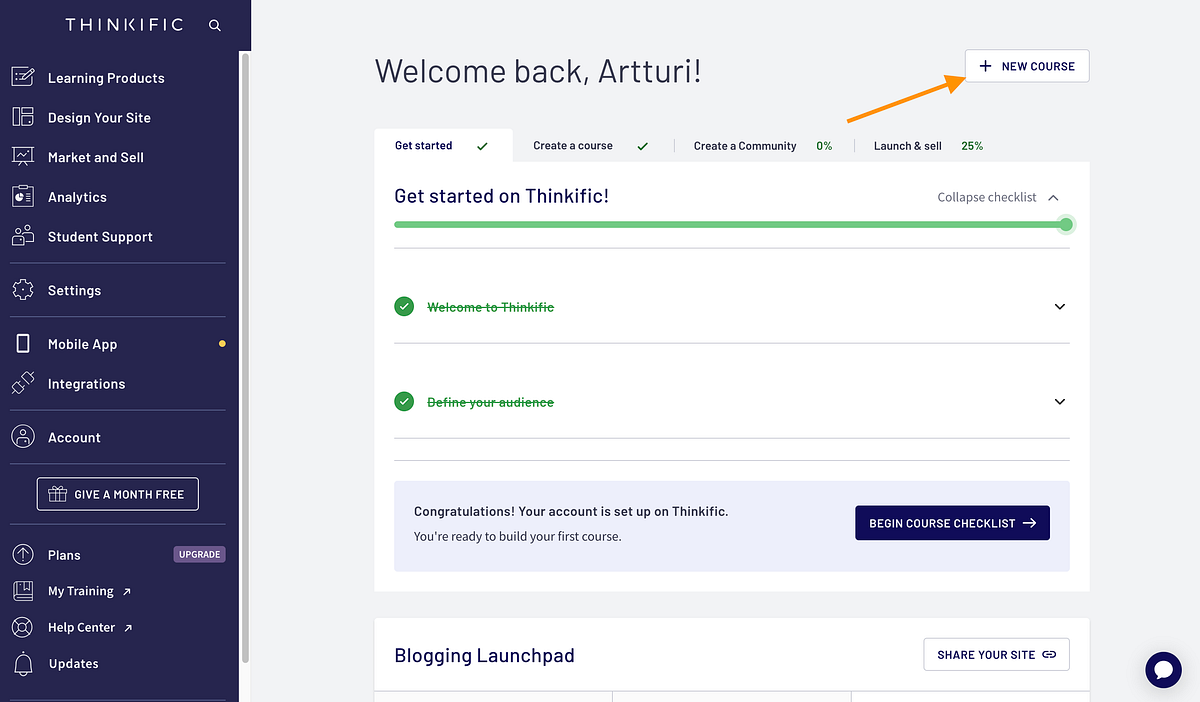
Once you’ve signed up, you can start creating your first course by clicking the “+ New Course” button.

The first thing you’ll see is the option to choose a course template. This is where Thinkific already stands out. It gives you several templates to pick from and build on top of.
For this example, I’m choosing the “Blank” template.

Next, you can start creating Chapters for your course.
In Thinkific, courses are made up of Chapters, and each Chapter contains Lessons.
For example, your first Chapter can be a simple course introduction. Inside it, you can add short lessons like “Introduction,” “Who I Am,” “Prerequisites,” or “What to Expect.”

Once you start adding lessons to your chapters, you’ll need to choose the type of learning content you want to use.
Thinkific doesn’t just give you video, text, or quiz options. There’s a lot more to pick from.
I was honestly surprised by how many different lesson types there were. When I created my first course, I thought it would just be one long video.


Another thing I really like about Thinkific is that you can add extra materials to your lessons.
For example, if you’ve added a video lesson, you can scroll down and include notes, thoughts, or even small corrections in case you said something you didn’t have time to edit out.
You can also upload downloadable files here. In my blogging course, for instance, I’ve added a few templates as downloadable items.

Speaking of video lessons, one small downside is the file size limit and the long wait time for previews.
It makes sense since the platform needs to process each video before it’s ready to display, but it can still be confusing. Sometimes it takes 30 to 60 minutes before a video actually shows up.

Thinkific also recommends compressing your videos with a tool like Handbrake so they upload faster and handle longer runtimes better.
I can’t remember the exact limit, but in my case, videos longer than about 30 minutes sometimes had trouble uploading. It’s not a big issue though — you can just split them into shorter lessons.

Another thing I really enjoy doing on Thinkific is adding small quizzes to test my students.
You can easily add these quizzes as separate lessons inside your course.

Then just write your question, add the possible answers, and select the correct one.

Oh, and one really handy feature is that you can drag and drop lessons and chapters in the course editor.
You don’t have to build your course in any specific order, which makes organizing everything much easier. 🙂

One thing that’s definitely worth trying out is the Thinkific Apps, also called Integrations. These are made by third parties and can add extra features to your Thinkific setup.
If you ever feel like something is missing, you can often find an app that fills the gap.

The only downside is that these apps can be pretty expensive. Most of them cost about as much as the Thinkific Standard plan itself.
That feels a bit steep just to add one extra feature on top of everything the platform already offers. But if you really need it, then sure — go for it! 🙂

Customizable Website
Now, what about a website for your course? Thinkific has that covered too.
There’s a built-in landing page builder that lets you create a nice, high-converting page for your course.
The best part is that the default layout already looks great, so you can use it as a solid starting point.
Let’s try it out for my sample course:

Here’s the ready-made course page for the sample course I just created.
As you can see, it already looks good and does the job. You can always add your own style and personality to it, but the base layout is solid.
It shows the course name right away and includes a clear call-to-action button to enroll.

If you scroll down, you’ll see more sections that help promote your course.

If you want, you can change the theme of your course pages by clicking “Theme Settings” on the left side. This lets you adjust colors, fonts, images, and more.
The only problem I ran into was that I didn’t realize these settings apply to all courses. So while testing it out, I ended up changing the look of all three of my courses instead of just the test one.

Anyway, the site-building tools are so simple to use that I really recommend just jumping in and experimenting.
You can add new sections to your page with the “+ Add Section” button. It’s honestly that easy to build the website for your course.

For example, let’s add a small countdown timer at the bottom of the page to create a bit of urgency and boost sales.
To do that, just click “Add Section” and search for “Counter.”

Then I just click on the counter option, and it instantly appears on the page.

To adjust how long the timer runs and what it displays, just click the counter and set the expiry date on the left-hand side.

This shows how the site builder works. Just hover over any element, click “Edit,” and make your changes.

This makes it super easy to use. Just pick an element and tweak it with simple, intuitive controls.

The only thing that’s really missing is more customization. It’s not a dealbreaker, but it’s something you’ll notice pretty quickly.
For example, I wanted to show a strikethrough on the original price next to the discounted one, like this:

But this was not possible on Thinkific by default.
Marketing and Sales Tools
Once you’ve built your course and landing page, it’s time to market it.
People won’t just find your page and buy right away. You need to actively promote it with offers, funnels, and other strategies to get eyes on it.
And no surprise here — Thinkific helps with that too!

For example, you can offer a free preview lesson and keep the rest of the content locked behind a paywall.

Or you can create discount coupons to promote your course and drive more sales.

These are super useful. You can even limit the coupon to the first 10 sign-ups to make the offer more appealing.

Analytics and Reporting
Once you have more students and content, you can use the built-in analytics to track things like transactions, revenue per user, total revenue, and more.
Some of these stats are available with the Standard plan, but for deeper insights, you’ll need to upgrade to a higher plan.

I’m not sure I’m a big fan of this feature yet. On the other hand, I only have two courses, and I can already see all the important analytics I need without upgrading, so there’s really nothing to complain about for now.
Student Management and Support
Last but not least, you can also offer support to your students.
This becomes really useful once you have a larger group of learners, and it’s something that would be hard to manage without a platform like this.

For example, you can track how your students are doing.
- Who’s struggling?
- Who hasn’t started yet?
- Who’s already completed the course?
And plenty more.

You can also reward your students with a certificate once they complete your course.
This adds extra motivation for them and makes your course look more professional and appealing.

Preview the Student View
When your course is ready to publish, you can enroll in it yourself as a student to see how everything looks and works from their side.

This is one of the things I really like about Thinkific. The platform handles all the technical stuff for you — organizing lessons, tracking progress, and displaying lecture and chapter numbers.
It’s super convenient for students. Instead of sending them to a random Drive folder, you’re giving them a clean, user-friendly learning experience.


That’s the real benefit of using Thinkific. Without it, you’d have to code all these features yourself, which would be a huge hassle.
Sure, you could host a course by sharing a private video link, but if you want to track progress, manage payments, build a landing page, and keep things organized, a platform like Thinkific makes all the difference.
Pros
- Comprehensive platform: As you’ve seen, Thinkific has everything you need to create a smooth, user-friendly course experience.
- Progress tracking and analytics: You can easily see how students interact with your content, how far they’ve progressed, and what’s performing well.
- Payments: Thinkific handles payments, refunds, coupons, and all the other technical details for you.
- Responsive support: I’ve sent quite a few questions to support, and they always reply quickly, even though I’m in a completely different time zone.
These are just a couple of good things I have to say about Thinkific. You can for sure host a course without a platform like this, but everything becomes infeasibly inconvenient.
Cons
- Limited customization: The basics are all there, but if you want to fine-tune or customize something specific, your options are limited. For example, I couldn’t add a strikethrough for the original price on my landing page.
- Expensive apps: If Thinkific doesn’t include a certain feature, you might find it as an integration app — but those usually come with a high price tag.
- Occasional downtime: When I first started, my account went down for a few days because I hadn’t submitted some tax documents. My students started asking what was going on, and I wish there had been a clear warning in Thinkific’s dashboard about it.
Pricing

There are quite a few plans on Thinkific:
- Free plan — $0
- Basic plan — $49 per month
- Start plan — $99 per month
- Grow — $199 per month
To Take Home
Thinkific is an awesome platform (other than the sometimes slow support).
Definitely give it a try if you’re planning to host an online course.
You can even start for free.
It lets you create different types of lessons, track student progress, make sales, promote your courses, and a lot more.
The only small downside is that it’s missing a few marketing features, and the landing page builder can feel a bit stiff at times. But honestly, those are tiny details you won’t need to worry about until you have hundreds of students. 🙂
Thanks for reading!
Learn more about Thinkific Review: Best Online Course Tool for 2025?