ft. the official MCP Python SDK & Auth0
The Model Context Protocol (MCP) is a standard way to connect tools to your favorite AI apps. You may have used it to connect ChatGPT to your Notion account or Claude to your GitHub. However, it’s now possible to create and connect custom MCP servers to these apps. In this article, I’ll walk through how to build a remote MCP server and connect it to ChatGPT.

LLMs are only as good as the context you give them. That used to mean (painstakingly) copying and pasting text in the chat window every time we wanted help writing an email or fixing a bug.
Today, however, we can give LLMs the right tools so they can retrieve relevant context on their own.
Here, I’ll discuss how we can build custom toolsets and securely give them to our favorite AI apps using MCP. I’ll start by reviewing key concepts and then walk through a concrete example with code.
MCP Basics
MCP is a standard way to give tools to AI apps. It uses a so-called client–server architecture, where an MCP client (inside ChatGPT) communicates with an MCP server to make tool calls and gather helpful context.

MCP servers are where our LLM’s tools live. For example, there are MCP servers for doing things like fetching web content and storing memories, and for integrating apps like Notion, Google Drive, and GitHub [1].
You can also build custom MCP servers to give arbitrary tools to LLMs. You can run these servers locally and connect them to AI apps running on your computer. Or you can run them remotely and connect them to apps running on the Internet (e.g. ChatGPT and Claude).
MCP Authorization
If you’re running your MCP server remotely (i.e. it’s accessible via HTTP), it’s probably a good idea to set up authorization for it. This ensures only approved users and apps can access it.
The recommended way to do this is via an OAuth-based auth flow [2]. OAuth is an open standard for allowing app A to access data from app B on a user’s behalf (without requiring a password).
Three entities are required for remote MCP authorization. They are listed below, along with an overview of one possible auth flow [2].
- The MCP Server = resource server i.e. the thing being accessed
- The MCP Client = OAuth client i.e. the thing requesting access
- The Auth Server = issues access tokens after authenticating the client

Example: Connecting a (Custom) YouTube MCP Server to ChatGPT
Now that we have a basic understanding of how MCP works, let’s build and connect a remote MCP server to ChatGPT. Here I’ll build a server that can fetch YouTube transcripts given a URL.
I’ll use the official Python SDK to create the server, Railway to host the server remotely, and Auth0 to enable the OAuth flow.
The example code is freely available at this GitHub repository.
Step 1: Create MCP Server
To create our custom server, we’ll start by importing a few libraries.
# to load env variables
import os
from dotenv import load_dotenv
# official MCP Python SDK
from mcp.server.fastmcp import FastMCP
from mcp.server.auth.settings import AuthSettings
# for configuring auth
from pydantic import AnyHttpUrl
Next, we’ll load environment variables and server instructions from a file.
# Load environment variables from .env file
load_dotenv()
# Get Auth0 configuration from environment
auth0_domain = os.getenv("AUTH0_DOMAIN")
resource_server_url = os.getenv("RESOURCE_SERVER_URL")
# Load server instructions
with open("prompts/server_instructions.md", "r") as file:
    server_instructions = file.read()
We also need to create a class to verify OAuth tokens. A script for this is available on GitHub. With that, we can import it in the following way.
from utils.auth import create_auth0_verifier
# Initialize Auth0 token verifier
token_verifier = create_auth0_verifier()
Finally, we can create our MCP server with the FastMCP() class.
# Create an MCP server with OAuth authentication
mcp = FastMCP(
    "yt-mcp", # server name
    instructions=server_instructions, # instructions for using tools
    host="0.0.0.0", # where to host
    # OAuth Configuration
    token_verifier=token_verifier,
    auth=AuthSettings(
        issuer_url=AnyHttpUrl(f"https://{auth0_domain}/"), # auth server url
        resource_server_url=AnyHttpUrl(resource_server_url), # mcp server url
        required_scopes=["openid", "profile", "email", "address", "phone"],
    ),
)
To add a tool, resource, or prompt, we simply add the corresponding decorator to a custom Python function e.g. @mcp.tool.
Since I covered this in a previous blog post and YouTube video, I won’t go into the details here. Additionally, the full implementation is (again) available on GitHub.
Step 2: Deploy MCP Server
Now that we have our MCP server, let’s deploy it. While you can use any hosting service for this, I used Railway.
The steps are as follows:
- Push the MCP Server code to GitHub
- Connect your GitHub account to Railway (or better yet, sign up with your GitHub account)
- Go to your Railway dashboard and click “New”
- Then click “GitHub Repository” and select your repo from the list

Next, we’ll need to add environment variables to our deployment. This is available in the Railway project’s Settings > Shared Variables, where we’ll need to add the following:Auth0_DOMAIN , AUTHO_AUDIENCE RESOURCE_SERVER_URL.
We’ll setAUTHO_AUDIENCE and RESOURCE_SERVER_URL equal to our Railway project URL followed by “/mcp” e.g. https://yt-mcp-remote-production.up.railway.app/mcp. For Auth0_DOMAIN, we will first need to set up our Auth0 server.

Technical note: to get the
fetch_video_transcripttool to work on Railway you will need to enable a proxy service (e.g. Decodo) and add the following env variables:PROXY_USERNAME,PROXY_PASSWORD, andPROXY_URL.
Step 3: Set Up Auth0
Although our server is now running in the cloud, we can’t use it yet because we haven’t set up the authorization server. To do this, we can use Auth0.
⚠️ Warning: there are several steps here
We first create an Auth0 Tenant. If you are signing in for the first time, this should be the first page you see. Give a name and region to your tenant.
Once your tenant is created, note the domain name e.g. my-mcp-server.us.auth0.com , and set it as your Auth0_DOMAIN Railway environment variable.
Next, we’ll need to set up the Auth0 API. Do this by going to Applications > APIs in the sidebar and then clicking “+ Create API”. From there, give your API a name and set the identifier as the AUTHO_AUDIENCE (i.e your Railway project URL followed by “/mcp”).

Due to a mismatch between the auth parameters requested by AI apps like ChatGPT and those provided by Auth0 (more details here), we will need to enable a default audience for our tenant [3].
We do this by navigating to (tenant) Settings in the sidebar. Under the General tab, scroll down to API Authorization Settings and paste the AUTHO_AUDIENCE under Default Audience.

Next, we’ll enable Dynamic Client Registration (DCR), so apps like ChatGPT and Claude can register themselves with the Auth0 tenant. This is located under Settings > Advanced > Settings, as shown below.

Finally, to get DCR to work, we will need to promote our user database connection to the domain level. For this, go to Authentication > Database > Username-Password-Authentication > Settings and enable “Promote Connection to Domain Level”.
Optionally, you can “Disable Sign Ups” so that only pre-approved users can access the MCP server.

Step 4: Connect to ChatGPT
Congrats, you survived the Auth0 setup. Now, let’s connect the server to ChatGPT.
The custom connectors feature in ChatGPT is still in Beta, so you will first need to enable your account in “Developer mode” (available only to Plus and Pro users). You can do this in ChatGPT via Settings > Apps & Connectors > Advanced settings > Developer mode.

Now, to add the MCP Server, go back to Settings > Apps & Connectors and click “Create”. Then you will see a page for setting up a new connector.
Give it a name and description (optional). Under MCP Server URL, use your RESOURCE_SERVER_URL(i.e your Railway project URL followed by “/mcp”). Use OAuth as an authentication method, check the box, and hit “Create”.

This will kick off an OAuth flow. If you left sign-ups enabled, you can create an account and sign in. Otherwise, you will need to create a user in your Auth0 tenant under User Management > Users.

Now you should see a page with details about your MCP Server and a “Connect” button. From here, connect to your server and open a new chat.

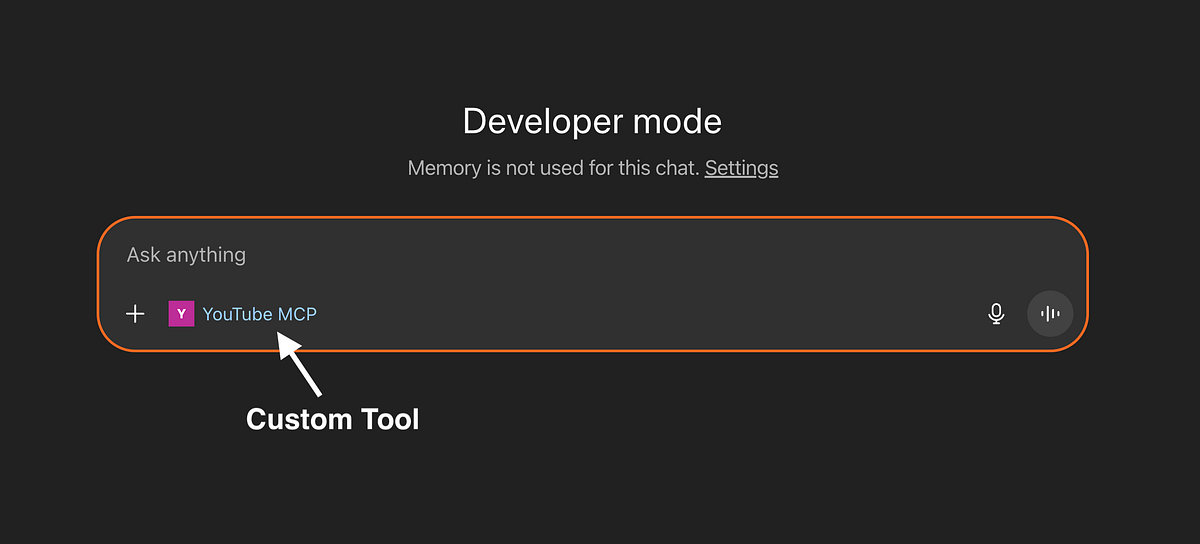
You can now use the custom MCP server in ChatGPT! Just add “@ your-connector-name” to any request to try it out.

Conclusion
MCP is a standard way we can augment AI apps with custom tools and integrations. Here we saw how to build, deploy, and connect a custom YouTube MCP server to ChatGPT.
As OpenAI transitions to becoming an “AI platform”, MCP is a natural candidate for facilitating connections between ChatGPT and 3rd party apps. In other words, developers can build custom ChatGPT connectors and sell them to users, creating a new type of SaaS.
If you have any questions or suggestions for future content, please let me know in the comments. Thanks for reading 🙂
💻 Get 30 (free) AI project ideas: https://the-data-entrepreneurs.kit.com/30-ai-projects
References
[1] MCP Servers
[3] Audience/Resource dilemma with Auth0