Ad – This post is sponsored by Bricoflor.
We’ve barely unpacked our moving boxes and most of our new home is still in a complete state of disarray but that’s not stopped us from working on our first room makeover.
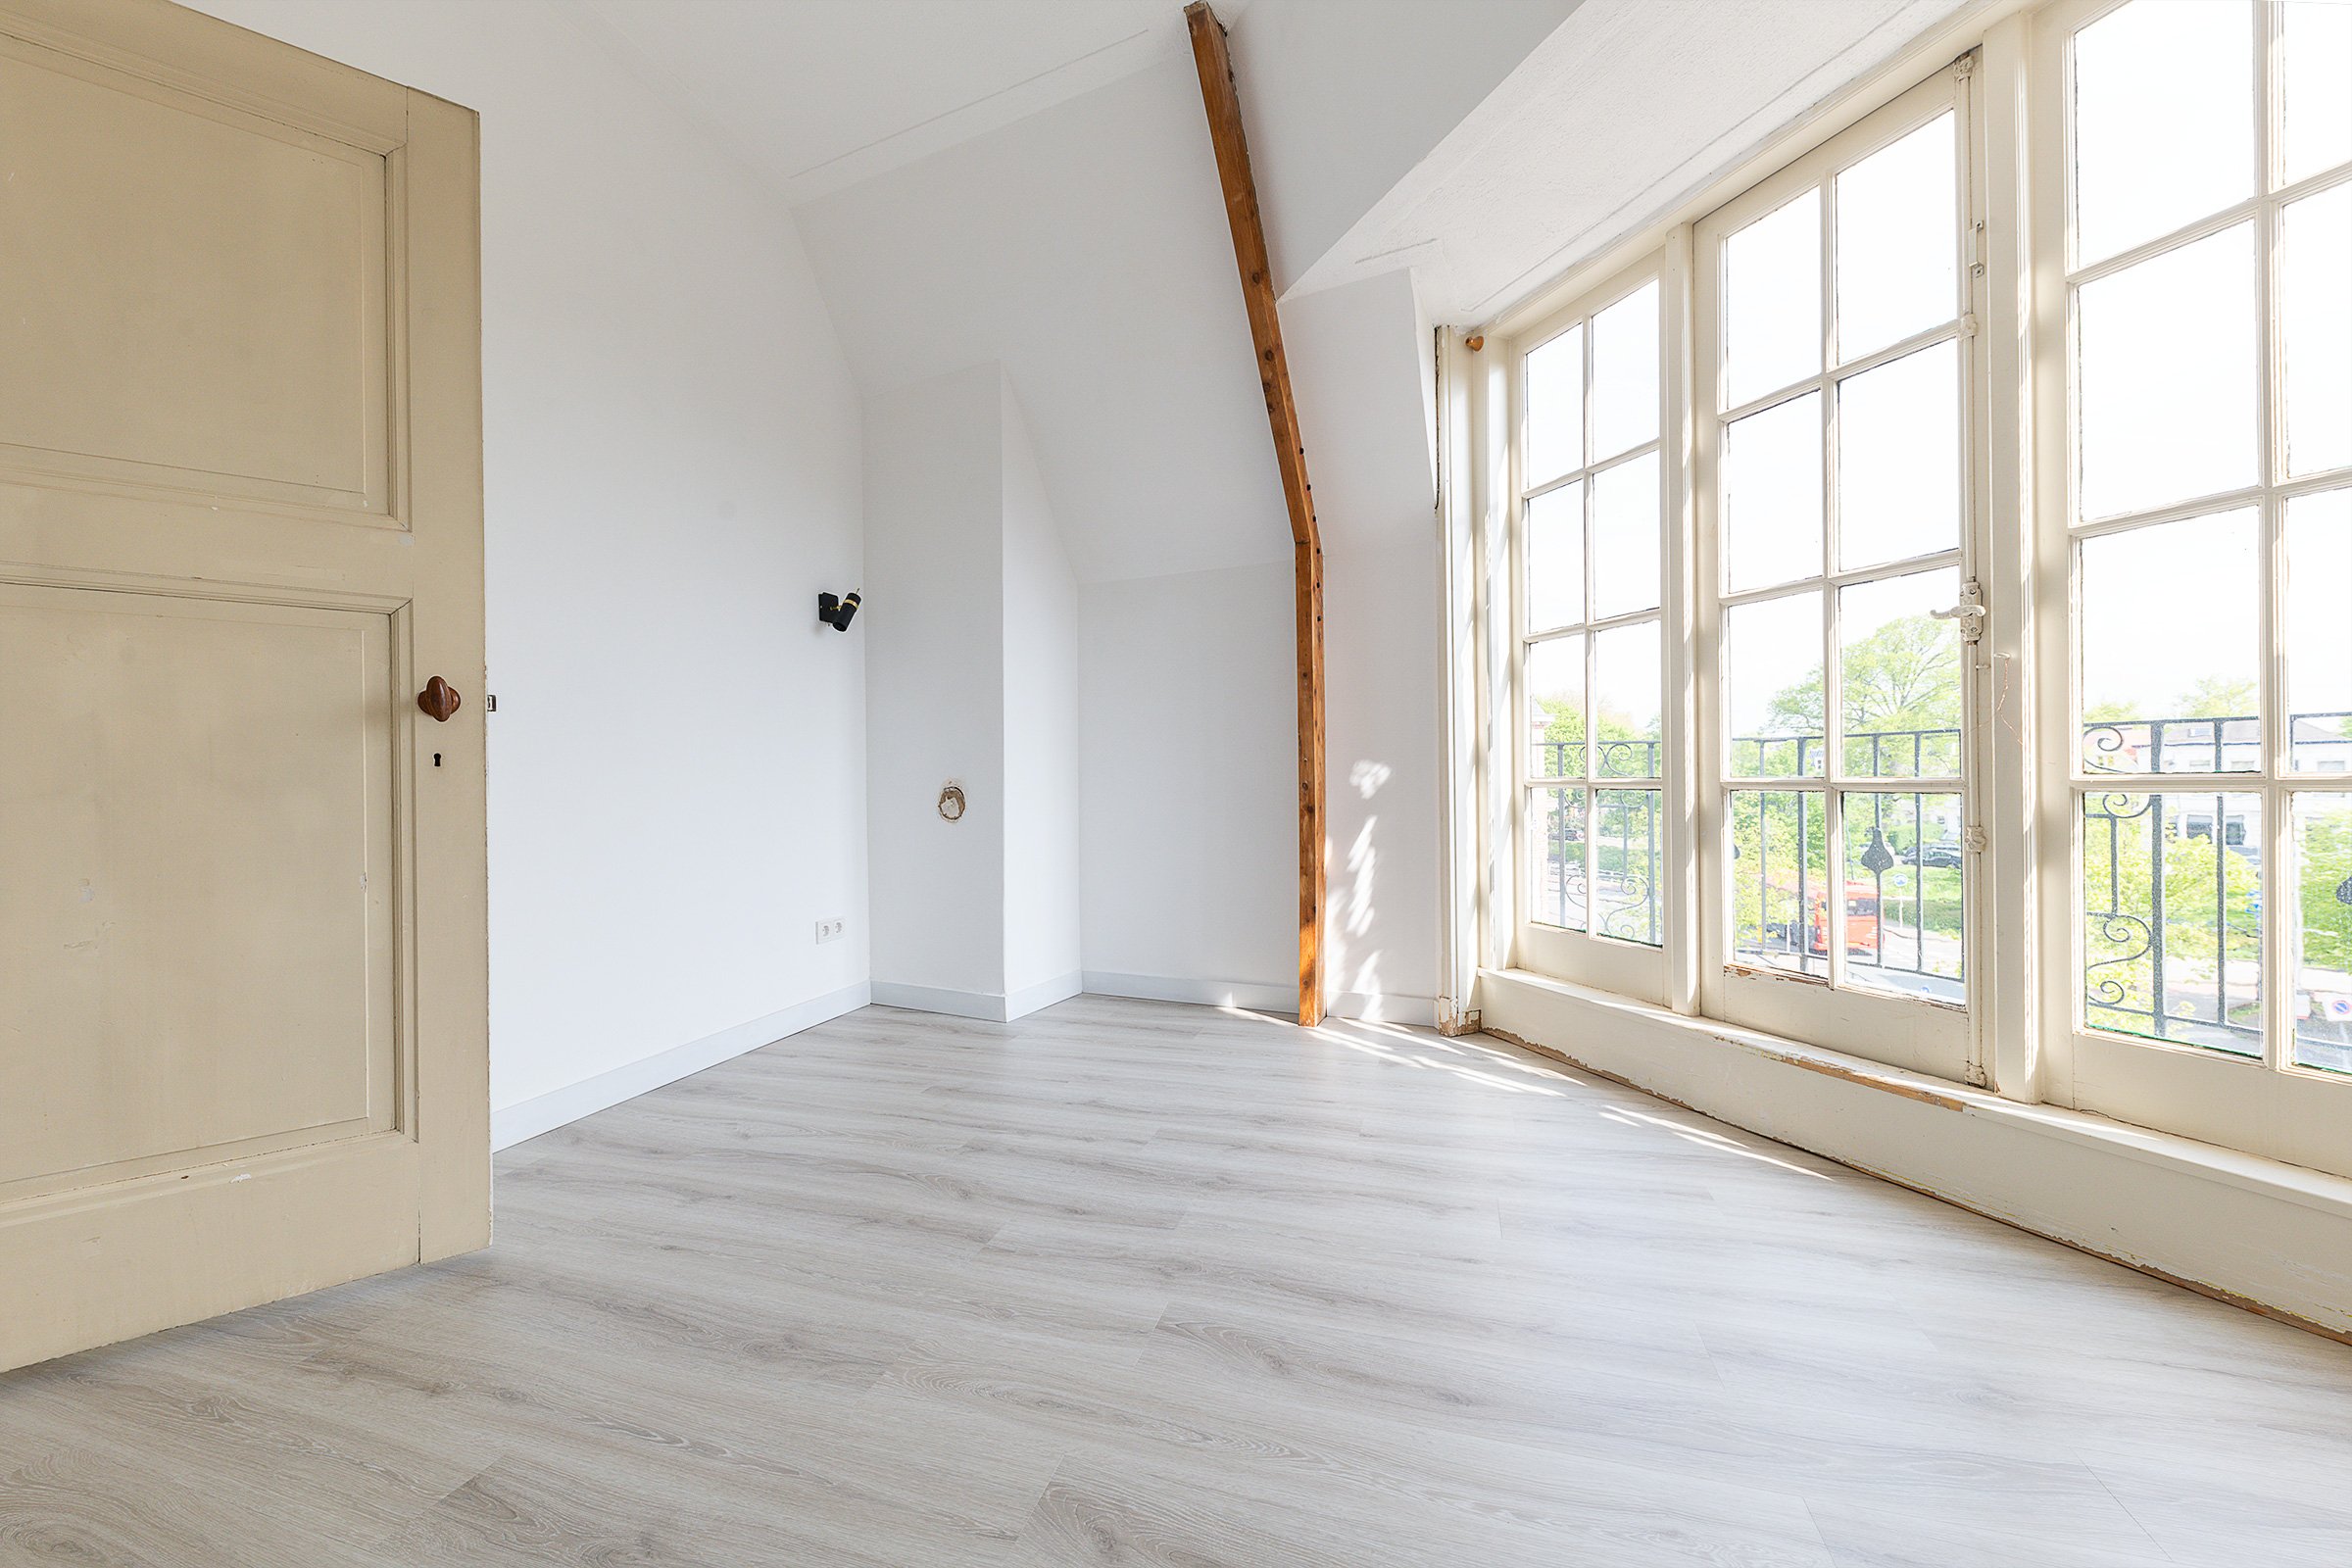
And, for the first time ever, we’ve installed a new luxury vinyl plank floor!

Isn’t it gorgeous?
I totally admit that I was a bit daunted about laying a whole floor myself. Whilst we’ve tackled hundreds of DIY projects over the years, laying a floor is something I’d never done before and I was a bit apprehensive, to say the least.
It turns out that I really shouldn’t have worried as laying a vinyl plank floor is so much easier and quicker than I’d expected. I honestly think that it’s something even the most novice DIYer could easily accomplish and you don’t even need power tools!

There are obviously still lots of things that need sorting in this room. The window needs restoring, the yellow door will need to be stripped and repainted and the radiator still needs to be installed, too. We’re so excited about the progress so far though, especially if you know that the same room looked like this not long ago!

Laying a vinyl plank floor is easy but there are a few things to consider before you install one in your home and we’re sharing the exact process of how to install a vinyl plank floor along with our tips for getting a professional finish.
How To Plan A Luxury Vinyl Plank Floor
When starting any home improvement project, it’s always important to plan everything in as much detail as possible so that you don’t run into any unexpected problems further down the line and when it comes to planning a luxury vinyl plank floor it’s no different.
01
Measure your room and calculate the quantities
When laying a new floor, the first thing you’ll have to work out is how much flooring you’ll need for your room.
Calculate the floor area of your room and add about 10% extra for offcuts. If you have a rectangular-shaped room the calculation is really easy and you just have to multiply the length by the width of the room.

As usual, we made things a bit more complicated and decided to lay our new luxury vinyl plank floor in a rather odd-shaped room, which meant that we had a couple more calculations to do.
02
Choose your vinyl plank floor
Once you’ve worked out how large your floor area is, it’s time for the fun part – choosing your luxury vinyl plank flooring.
LVT flooring (which stands for luxury vinyl tile) is becoming more and more popular and it’s easy to see why. Not only are there a huge amount of different floor finishes to choose from, but it’s also extremely durable, has a low installation height so is perfect for renovations and it’s water-resistant and suitable for bathrooms and kitchens, too.

We ordered our new floor at Bricoflor who deliver across most of Europe and the UK. They specialise in flooring, carpets and even wallpaper so are definitely worth checking out if you have a home renovation project coming up. They have an enormous choice of flooring and I’m really not exaggerating when I say that deciding on a floor finish is the most difficult part of this whole project.
Luckily Bricoflor has a free sample service so that you can order up to 8 samples to be sure that you’re choosing the perfect floor for your home.
After much deliberation, we opted for Granorte Solid-Trend rigid vinyl flooring in Sea Sand. It has a lovely soft grey colour that feels both classic and modern at the same time. This vinyl flooring also has an integrated cork layer making it more sustainable as well as soundproofing benefits without having to lay any additional underlay.
03
Plan The Layout Of Your Flooring
When laying the floor, you should almost always start laying the planks along the length of the longest wall of your room. Take the position of your windows and the direction of the light into account, too. Ideally, the light will fall along the long length of the boards so that the joins between the boards become less visible.

Lastly, take a look at the direction of any other flooring adjoining the room. Ideally, you’ll want the boards to run in the same direction as any other flooring to give everything a seamless look.
The direction you lay your flooring will impact how wide or narrow a room feels, so take your time and work out the best solution for your room before you start laying the planks.
Once you’ve decided on the direction you’re going to lay the boards in, you can do a couple of simple calculations to make sure that boards are spaced equally across the room and that you don’t end up with a thin strip at one end of the room.

A 5 cm strip at the end of the room is perfectly acceptable but if your calculations mean that you’ll end up with a super narrow strip at one end of the room, cut the first row of boards in half so that you end up with two roughly the same sized boards at each end of the room.

Don’t forget to check this for the boards running lengthways, too. If we’d started by laying a full plank, we would have been left with a tiny piece at the other end of the room.
04
Tools & supplies to lay a vinyl plank floor
This post contains affiliate links. We only recommend products we love and think that you will, too! Read our full disclaimer here.
One of the great things about vinyl plank flooring is that you don’t need any fancy tools to lay it.

Optional (if you want to use power tools):
Prepare Your Subfloor For Your New Vinyl Plank Flooring
Now that all of the planning is out of the way you can finally start to lay your floor. Well, kind of. Depending on the condition of your subfloor you may have to do a bit of prep work first.
01
Make sure your subfloor is flat and level
The only thing that’s really important when installing a luxury vinyl plank floor is to make sure that your subfloor is as level and even as possible. Any imperfection will impact the quality of your finished floor and, even worse, will reduce how long the floor looks great as it can cause the click-system to loosen over time.
If your floor is uneven, you will have to level it first.

Our subfloor was fairly even but the floorboards had warped slightly making the surface very wavy. We tried to level out the floorboards as much as possible and opted to cover the whole floor with some 3mm thick HDF boards before laying the luxury vinyl plank floor on top.

02
Remove your skirting boards
Removing your skirting is optional but it’s what we’d recommend for the best possible finish. Alternatively, you can add half-round moulding strips to cover the gap between the floor and skirting but removing (and refitting) the skirting gives you a cleaner finish.

To give the floor a super sleek finish, it’s best to slot the vinyl boards under the door jamb. To do this, use an offcut of a board and hold it against the doorframe. Then with the help of either a fine saw or a multitool, cut away a tiny piece of the bottom of the frame using the thickness of the board as a guide.

Then cut away some of the vinyl plank so that you can slot it under the doorframe. We cut out all of the detailed areas with a jigsaw but you could easily cut it with a Stanley knife, too.


As you can see, this isn’t something we did. The luxury vinyl plank flooring we’re using has an integrated cork layer, so we didn’t have to lay any additional underlay.
Whether or not you need underlay will depend on the type of flooring you are using, so be sure to check the manufacturer’s guidelines before you start your project.
How To Lay A Vinyl Plank Floor
As weird as it sounds, you’ve already done most of the work! Because of all of the planning you’ve done, laying the floor will be really straightforward.
01
Lay the first row of flooring
Start in the left corner of your room and lay the first board with the click-grooves towards the room. Then wiggle in the next pieces to create the first row. It’s really important to make sure that the first row is perfect so that all the following rows look great, too.

Don’t forget to leave space around the edge of the room. This is so that the floor can expand when it gets warm. The best way to leave an equal gap is to use little spacers that you just place against the wall. They will help you keep a perfectly even expansion gap.

02
How to cut luxury vinyl plank flooring
When you get to the end of the room, you’ll have to cut the last board to be able to fit it into the gap. Instead of measuring, flip the board over, push it against the wall and draw a line where the boards meet.

Score a line where you made the mark with a Stanley knife and speed square. Don’t forget to cut it a tiny bit shorter so that you leave a 4-5mm gap around the perimeter of the room.
Then you can just snap the board in half along the line. That’s all there is to it – it really couldn’t be any easier!


One of the best things about this type of flooring is how easy it is to lay and cut.
You don’t need any fancy tools or equipment. All you need is a Stanley knife!
Obviously, you could use a circular saw or a jigsaw to make the cuts but a Stanley knife works really well and is much less messy than using a mitre saw. If you’re making lots of cuts along the length of the boards you may want to use a power tool, but you definitely don’t have to.

03
Lay more rows of vinyl plank flooring
Once you’ve laid the first row of flooring, the rest almost lays itself. Use the leftover piece of board that you finished the first row with to start the next and then keep adding more and more pieces of vinyl flooring boards until you’ve covered the floor.


Make sure to wiggle the pieces together so that they are firmly connected.
Depending on the type of click connection of your flooring, you may need to have a rubber mallet handy to be able to carefully hammer the short connection sides together. This very much depends on the type of flooring you’re using though, so check the instructions first.

We didn’t have a rubber hammer, so used a block of wood (to protect the floor) and a normal hammer instead.
04
Lay the last row of vinyl floor planks
For the last row, you’ll probably have to use a pull bar to be able to secure the pieces of flooring together.

Slot the piece of flooring planks into the gap (don’t forget to leave a gap for the floor to be able to expand). Hook the pull bar behind the last piece of floor and give it a tap to make sure the vinyl planks slot firmly together.
05
Fitting vinyl plank flooring around radiator pipes
Fitting the vinyl planks around radiator pipes is surprisingly easy.

Start your row with a small piece of flooring and mark the position of the centre of the pipes. Then take this piece of floor and slot it together with the next plank and drill holes where the two boards meet.

Position them on your floor and slot the pieces together like you would with all other pieces of flooring.
The Finishing Touches
Now that you’ve finished your floor, it’s time to add the finishing touches. The very last thing to do is reattach the skirting boards (or half-moulding strips if that’s what you are using).

Remove the distance holders and nail (or glue) the skirting back to the wall. Because the floor floats, it’s important not to nail or glue the skirting to the floor.
Where the floor transitions from one room to the next, you’ll also have to install a threshold. You can get these to match your flooring but as we’ve not yet sorted the hallways flooring it’s something that’s still on our to-do list.

We’ve gone into a lot of detail about how to plan and install a luxury vinyl plank floor and have probably made it sound much more complicated than it actually is. Just make sure to plan your layout beforehand and follow some basic layout rules and you really can’t go wrong.

7 Important Rules To Follow When You Lay A Vinyl Plank Floor
Let the planks rest in the room where you will be laying them for at least 48 hours. If you’re anything like us, I know you’ll be eager to get this project started, but it’s important for the floor to rest to adjust to your room’s climate before you start laying it.

02
Don’t use short pieces & stagger the joints
To ensure secure connections between the individual planks, you shouldn’t use pieces that are less than 30cm long and it’s important to stagger the joints so that there’s a minimum distance of 20cm between them.

03
Make sure that your subfloor is level
If you want your floor to last and not be bouncy, you’ll have to make sure your floor is completely flat and level.


05
Open multiple boxes and mix the planks
Another tip to ensure an even finish of your finished floor is to open multiple packets of flooring and mix at least 3 of them when laying the floor.
This is because different batches of flooring will vary ever so slightly in colour and texture so it’s important to mix them up so that you don’t end up with sections of flooring with slight colour variations.

If a board doesn’t seem to fit, don’t force it. The edges of the boards are quite fragile so be careful not to damage them. Make sure the joint is completely clean and wiggle the board you are laying into the connection. After a couple of rows, it’ll become much easier.
Make yourself a template for more complicated cuts. We had a few areas around our window frames where it was quite tricky to get the vinyl planks to fit perfectly, so I made myself a paper template to use as a guide.

We absolutely love how our finished floor turned out. It doesn’t just look amazing, it feels really high-quality, too. The surface of the vinyl boards is slightly textured and really feels like it’s a natural piece of timber flooring.
Vinyl plank flooring is perfect if you are on a budget but still want a high-quality and gorgeous floor. The Granorte luxury vinyl plank floor we used comes with a 25-year warranty for residential properties so you really can’t go wrong!

The room is obviously still a long way off from being finished and in an ideal world, you should definitely finish all building work before laying your floor.
We will be covering it to protect it while we finish the rest of the room but luxury vinyl plank flooring is very hard-wearing so we aren’t too worried about it getting damaged.

Now someone just needs to stop me from ripping up all of the carpets in the house and laying vinyl plank flooring everywhere!
We’d love to hear what you think of our new floor! Would you have guessed that laying a vinyl plank floor is so easy? Let us know what you think in the comments below!
How To Lay A Vinyl Plank Floor FAQ
Start laying the planks along the longest wall. Ensure they are perfectly straight and don’t forget to leave a small gap for the floor to be able to expand. Ensure that the first row is perfect before adding the next rows.
Yes, laying a vinyl plank floor is very easy. We had no previous experience laying a floor, but laying a vinyl plank floor is very easy and beginner-friendly. Best of all, you don’t need any expensive tools.
The best way to cut vinyl planks is with a Stanley knife. Just score along where you want to cut and snap off the excess.
Generally, you start laying the planks along the longest wall but there are other things to take into consideration when deciding on the direction to install the floor, too. The direction you lay the floor will impact how the room feels. You can see more things to consider when deciding on the direction to lay your vinyl flooring here.
If you like this project, you will love these ones, too!