The Photos app in Windows 11 has been one of its most awaited features, ever since the launch of the new OS.
A new Photos app may sound boring to some, but the unique look and some innovative features of the new Windows 11 version give it an edge over the Windows 10 one. So, let’s explore Windows 11’s photo app and see how you can use it to view, edit and enhance your photos.
View the Info of a Picture

There might be times when you want to know the details of an image, like when you want to know if its size would be right for a digital album. With Windows 11, you can easily view that info.
When viewing a picture, click on the ⓘ or Information icon on the photo toolbar that appears on top of the image. The right pane will open up for you to view image details, like date taken, size, and resolution.
View a Slideshow of Pictures
If you want to show off your pictures to friends or family, you can always enjoy them in a slideshow.
To view a slideshow of all images, click on the three-dot button at the top right of your Photos app, and select Slideshow from the drop-down menu. This option will start a slideshow of all the pictures you have.

Alternatively, when viewing a photo, click on the three-dot button on the photo toolbar and select Slideshow from the drop-down menu.
To view the slideshow of an album, just click on the Play button on the top bar of the album you are viewing.
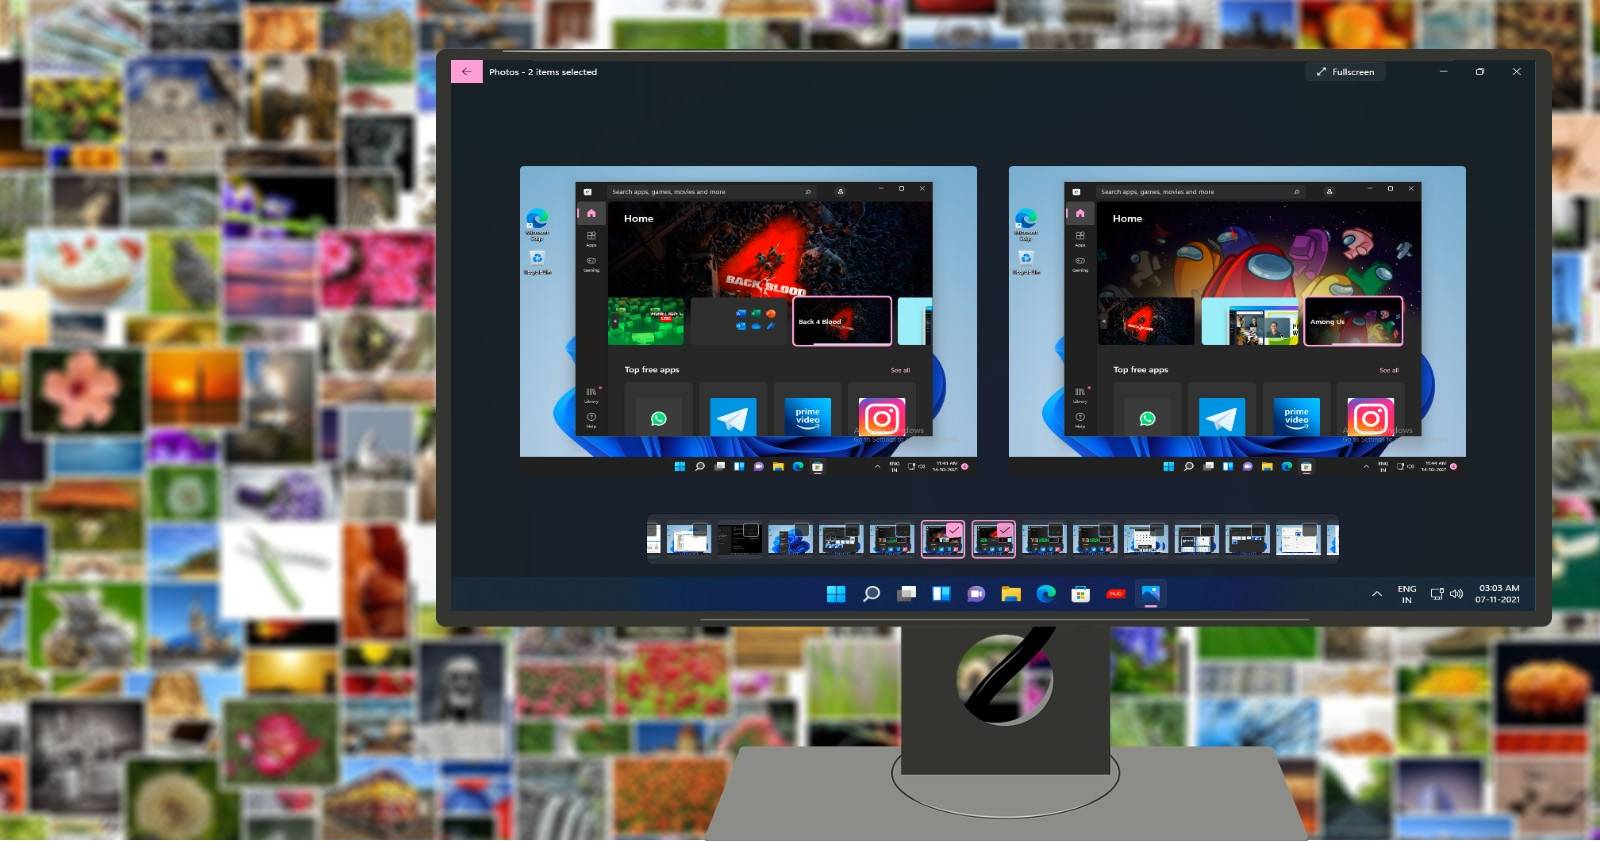
Compare Pictures With the New Multi-View Experience
If you’re a photographer, you’ll likely know how hard it can be to compare two similar photos to pick the right one. You can’t do this comparison in Windows 10 by default, but the new multi-view look in the Windows 11 Photos app makes it easy.
When you are viewing a picture, a “filmstrip” of images will appear on the bottom of the window. This new filmstrip also allows you to quickly jump around your photos directly by selecting the image tiles.

On moving the cursor on top of a tile, you will see a checkbox on the top right corner. Simply tick the checkbox and that image will stack up next to the one you were viewing. Now you can easily compare them side by side.
You can choose as many images you want to compare by ticking the checkbox on their tiles.
And to enjoy photos in their full glory, you can dismiss both the photo editing toolbar and filmstrip by clicking on the photo viewer. You can then browse left and right distraction-free.
The photo toolbar has also been updated in the Photos app. Now it’s easier than before to access options like editing, rotating, and touching up images.
When you click open a picture the updated photo toolbar appears on the top of the image. Then, click on the Edit button to open editing options.

On the editing screen, you can crop, rotate, flip, change aspect ratios, adjust brightness and contrast, and even remove red eyes from photos.

There are also several cool filters that you can apply to your images.

You can even draw on your photos with your mouse or a pen on supported devices. Just click on the Draw icon on the Photo toolbar and it will open up the drawing page, where you can draw on your image using effects like a Ball Point Pen, Pencil, or a Calligraphy pen.
After editing your picture, just click on Save a copy to save your edited photos.

The updated photo toolbar also gives you the option to access third-party editing apps for advanced editing. Just click on the three-dot menu on the photo toolbar and select Edit photos like a pro.

The Microsoft store will open up showcasing the best editing apps like Luminar AI, Adobe Photoshop Elements, Affinity Photo, Corel PaintShop Pro, and Picsart. Then you can install and use them to edit your pictures.
Create an Album
You can also create digital photo albums for special occasions. In albums, your pictures are also organized and easily accessible.

To create an album, click on the double image icon on the top bar of the Photos app. Click on Album from the drop-down menu.

Now select the images you want for your album by ticking the checkboxes on the top right corner of each image. Then click on Create at the top right of the Photos app, and your new album will be ready.
Import Pictures Into the Photos App
The Photos app detects and shows all the pictures on your computer (be it downloaded images, screenshots, or images taken by the webcam). If you’re using a Microsoft account, all photos on your OneDrive will also be seen. But if a particular image folder or any pictures are not seen, you can import them with a couple of clicks.

Click on the Import icon on the top bar of the Photos app. Then depending on where you want to import the images from, choose From a folder or From a connected device.
Change the Date of an Image
For any reason whatsoever, you might want to change the date of any image in the Photos app.

When you open the Photos app, the thumbnails of all photos are displayed. Simply right-click on any picture and select Change date from the drop-down menu. A calendar will open up for you to change the date. Then click the tick button to save the date.
Organize Pictures by People
You can quickly and easily identify and organize photos of friends and family with the People feature in the Photos app. The People feature uses face detection and face recognition technologies to identify and group similar faces across multiple photos or videos in your collection.
To organize pictures by people, click on People on the top bar of the Photos app. Then click the Yes button to turn on the People setting.

To get started import some photos from your PC or phone. And in a short while, the People feature will detect people in every photo and group them.
Add Pictures to Favorites
You have a vast collection of pictures, but there are some of them that you like more and would want to show to loved ones. Well, you don’t need to search for them every time.
Simply add them to favorites. Just click on the heart icon on the photo toolbar, and it gets saved to your favorites. Alternatively, just right-click on an image and select Add to favorites.
Change the Appearance of the Photos App
The Windows 11 Photos app also lets you change its appearance to suit your liking.

To change the look of the Photos app, click on the three-dot button on the top right of the app, and select Settings. In Settings, simply scroll down to the Appearance section and choose from Light, Dark, or System Setting to choose your preferred look.
Enjoy Viewing and Transforming Your Pictures With the New Photos App
The Windows 11 Photos app has been designed to sync with the new visual design of the new OS. You will notice rounded corners, updated bolder typography styling, and new theme-specific color palettes across the app.
And now you are aware of its new features and functions. So go ahead—enjoy viewing and enhancing your photos and sharing them with loved ones.