
In Part 1 of this blog series I introduced you to the beginning of our rental house renovation. It’s not a large house but every inch needed to be touched in some way, shape, or form. So it was a little overwhelming. If you recall I mentioned there was some negativity regarding the project. I hate to admit it but the negativity was my bad attitude. My husband, Jeff and a helper, rolled up their sleeves and got to work. I took pictures and complained!
My husband tackled the bathroom renovation, while I worked on cleaning and painting the bedrooms. Keep in mind that the unit was filthy, so we needed the bedrooms completed (except for new carpet) so we could use them for staging areas for other projects.

Based on the photos you might be thinking it wasn’t all that bad. Well come a little closer and take a better look. Every surface in the unit, including walls, windows, baseboards, flooring, etc, were covered in dirt, grease, grime, and other unknown substances. Not to mention there was also pet hair stuck into the mix. These photos were taken AFTER we vacuumed.

I’m not going to bore you with all the photos of the dirt, but to help give you an understanding of the amount of grime, here’s a photo of the window after the first cleaning.

Cleaning. Cleaning. Cleaning.
The nasty smells mostly dissipated after the carpet and padding were removed. My attitude improved at this point, and I got to work. We had hoped to gut the kitchen, but decided to focus the majority of our budget towards the bathroom renovation, laundry room, and new carpet.
My budget to update the kitchen was two cans of paint and cleaning supplies. Challenge accepted.

I started cleaning in the kitchen. It required a thorough scrubbing at least three times. There was even more cleaning later as we cleaned up construction dust, but that was nothing compared to the initial cleanings!

I removed the kitchen cabinets so I could take them outside to scrub them. Not very pretty, right?

Come and take a closer look:

Seriously gross. My husband bought TSP to clean the cabinets with. I used that for the first cleaning, but then switched to Soft Scrub with a scrubbing sponge and then another round of cleaning with diluted Mr. Clean. Once all our projects were finished I sanitized everything one last time with Lysol.

Once I got most of the filth removed I lightly sanded the cabinets. A previous owner had painted them, but their choice of paint and roller was amateur at best. I would have preferred to strip the old paint prior to re-painting, but time didn’t allow for a full kitchen renovation, so I had to work with what was there. I was determined that the kitchen would be clean and decent for the next tenant.

Luckily the weather was mild so I was able to clean the cabinets outdoors.

I painted two coats on the backs of the cabinet doors first and then two coats on the fronts.

I brought the doors inside to dry overnight in one of the cleaned bedrooms before applying a second coat the following day. What a difference!

While the cabinets were drying I tackled the rest of the kitchen. I scrubbed the floors and walls. I removed contact paper from the interiors of the cabinets and then cleaned and sanitized them. The appliances were cleaned and sanitized as well as light fixtures and windows. One paragraph doesn’t capture the amount of work, but trust me it was extensive.

After the walls were cleaned I went ahead and added two coats of paint. It’s starting to take shape!

Meanwhile husband worked on prepping the walls before painting. He started by sanding the walls which helped remove some of the grime as well as smoothed out the previously poor paint job.

You might notice there is a toilet in the living room. We temporarily moved it out of the bathroom so my husband would have more room to work on the bathroom renovation. We also bought a new vanity for the bathroom but left it in the box until it was time to install. The box served as a convenient work station for the time being.

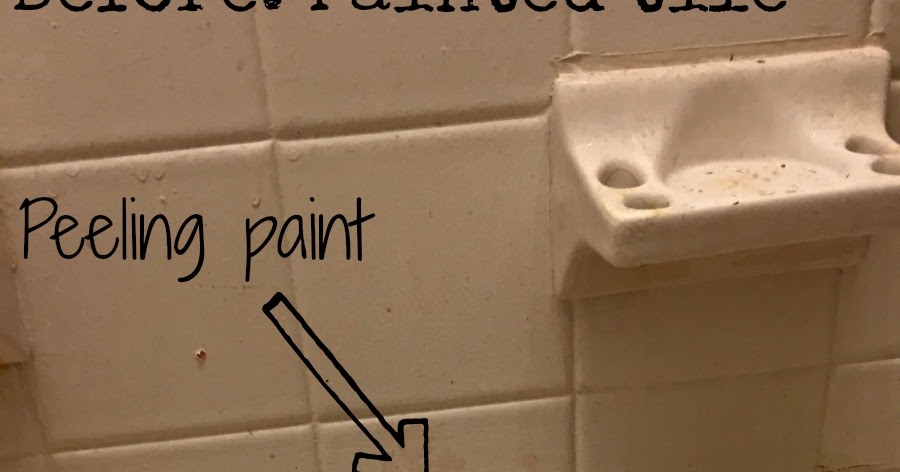
Bathroom
Jeff removed all the old tiles and drywall from the bathroom. A new shut off valve and access panel were added to the unit, and then new drywall was installed in the bathroom.

The bathroom is starting to take shape!

We debated purchasing a new bathtub but decided to have it resurfaced instead. A new tub surround was installed prior to having the tub re-glazed. The surround came as a kit with panels and adhesive. Basically we just applied the special adhesive to the back of the panels and then stuck it on the wall.


The old tub had chips and rust in a few areas, but it looked brand new after it was re-glazed. We debated a DIY kit, but decided to hire a professional to re-glaze the tub as we didn’t want to have to tear it out in a year or two.


Finishing Up
We were making progress on the house, but time is money, and the sooner we got it finished the sooner we could get a new tenant in place. So we hired a local contractor to extend the laundry room (it wasn’t deep enough to hold a washer and dryer), built a wall between the laundry and utility room, and added a new light. Luckily there was a box of flooring left over in the storage unit which was just enough to continue the kitchen floor into the laundry.

Everything was coming together at this point, but we still needed to sand and paint all the doors prior to having new carpet installed. The weather turned cooler, so we had to work indoors. The sanding dust required another cleaning of the kitchen, but honestly another cleaning couldn’t hurt.

My post is getting photo heavy which creates publishing problems. So I’ll include the after photos in a separate post. Here’s a quick look at the kitchen before and after.

Stay tuned for the next post which will include the full reveal. (You can see Part 3 HERE).