
TABLE OF CONTENTS
DOWNLOAD & DEMO
Here is the download link to the example code, so you don’t have to copy-paste everything.
EXAMPLE CODE DOWNLOAD
Click here to download | Example on CodePen
The example code is released under the MIT license, so feel free to build on top of it or use it in your own project.
SORRY FOR THE ADS…
But someone has to pay the bills, and sponsors are paying for it. I insist on not turning Code Boxx into a “paid scripts” business, and I don’t “block people with Adblock”. Every little bit of support helps.
Buy Me A Coffee Code Boxx eBooks
CUSTOM TOGGLE BUTTON DEMO
HTML CSS CUSTOM TOGGLE BUTTON
All right, let us now get into the details of how to create a custom toggle button using pure HTML and CSS only.
TUTORIAL VIDEO
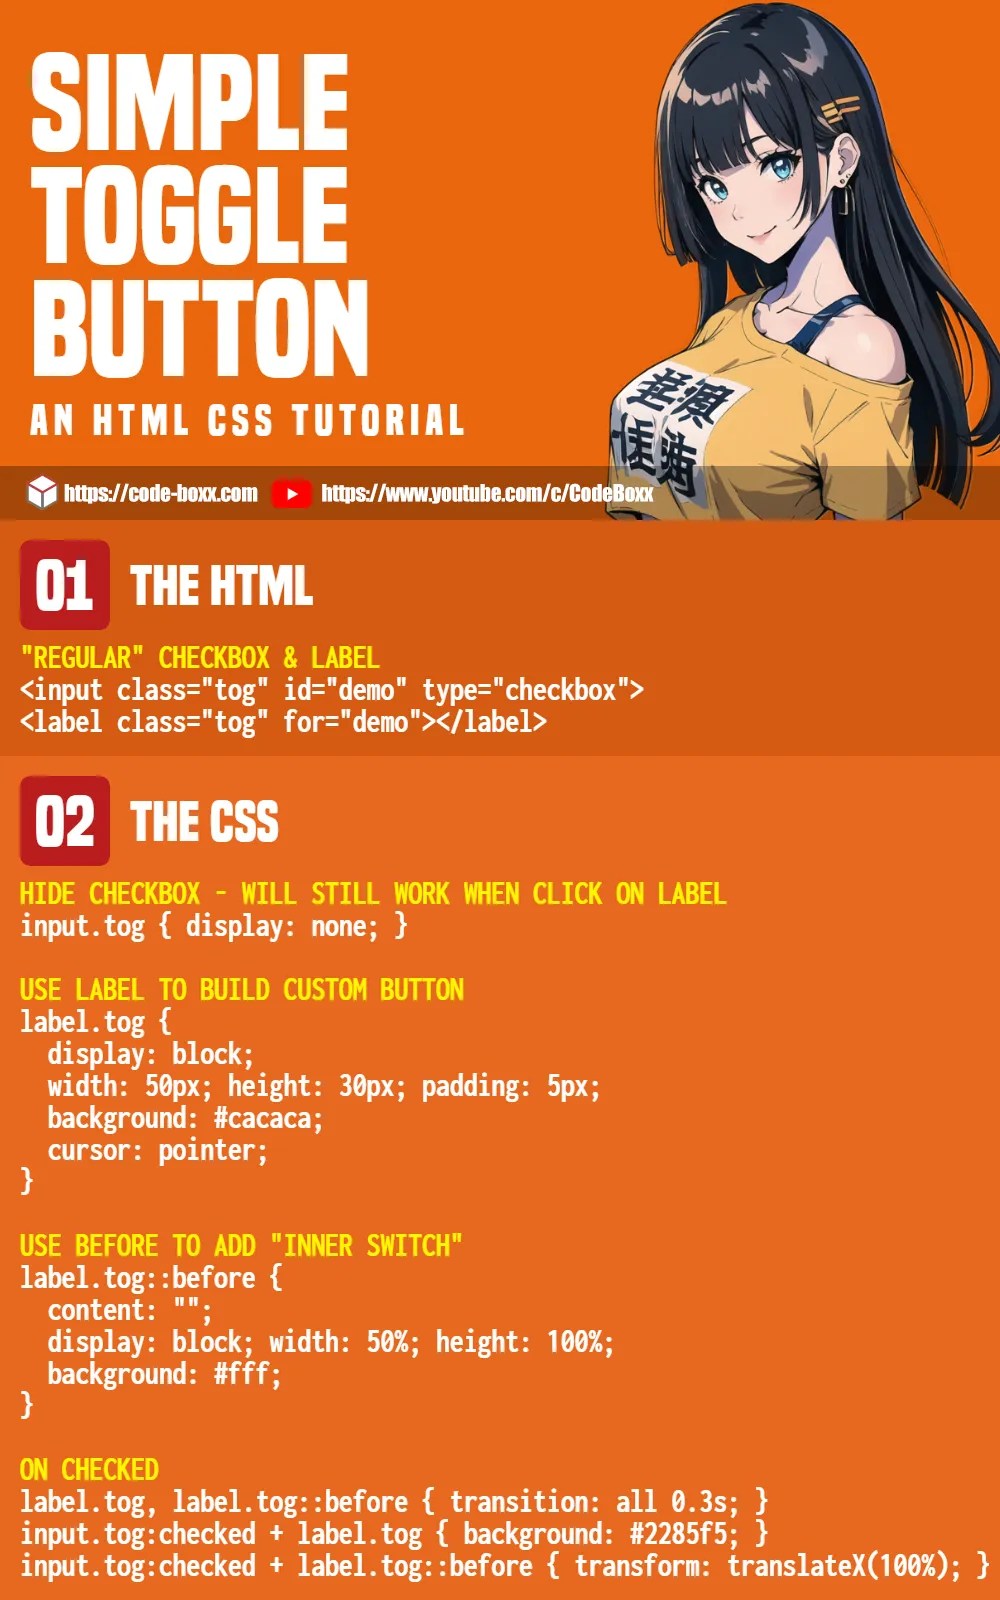
THE HTML
toggle.html
Yep. That’s all we need, just a “regular” checkbox and label.
THE CSS
toggle.css
- Hide the checkbox. It will still work when we click on the label.
- The idea is to use the label to build the toggle button instead. This section should be self-explanatory, we are just turning the label into an empty rectangle box.
- Then, use the before pseudo-class of the label to add the “inner switch”.
- When the checkbox is checked – Change the background color and move the “inner switch” to the right.
ON/OFF TEXT INDICATOR
Just make some minor changes to the CSS.
LINKS & REFERENCES
INFOGRAPHIC CHEAT SHEET
THE END
Thank you for reading, and we have come to the end of this guide. I hope that it has helped you with your project, and if you have anything to share with this guide, please feel free to comment below. Good luck and happy coding!